My cage
I sleep in a cage! The cage is built into Master's bed so I can sleep under Him every night. This page will tell you how to build a cage of your own.
What's the cage like?
Master's comfort
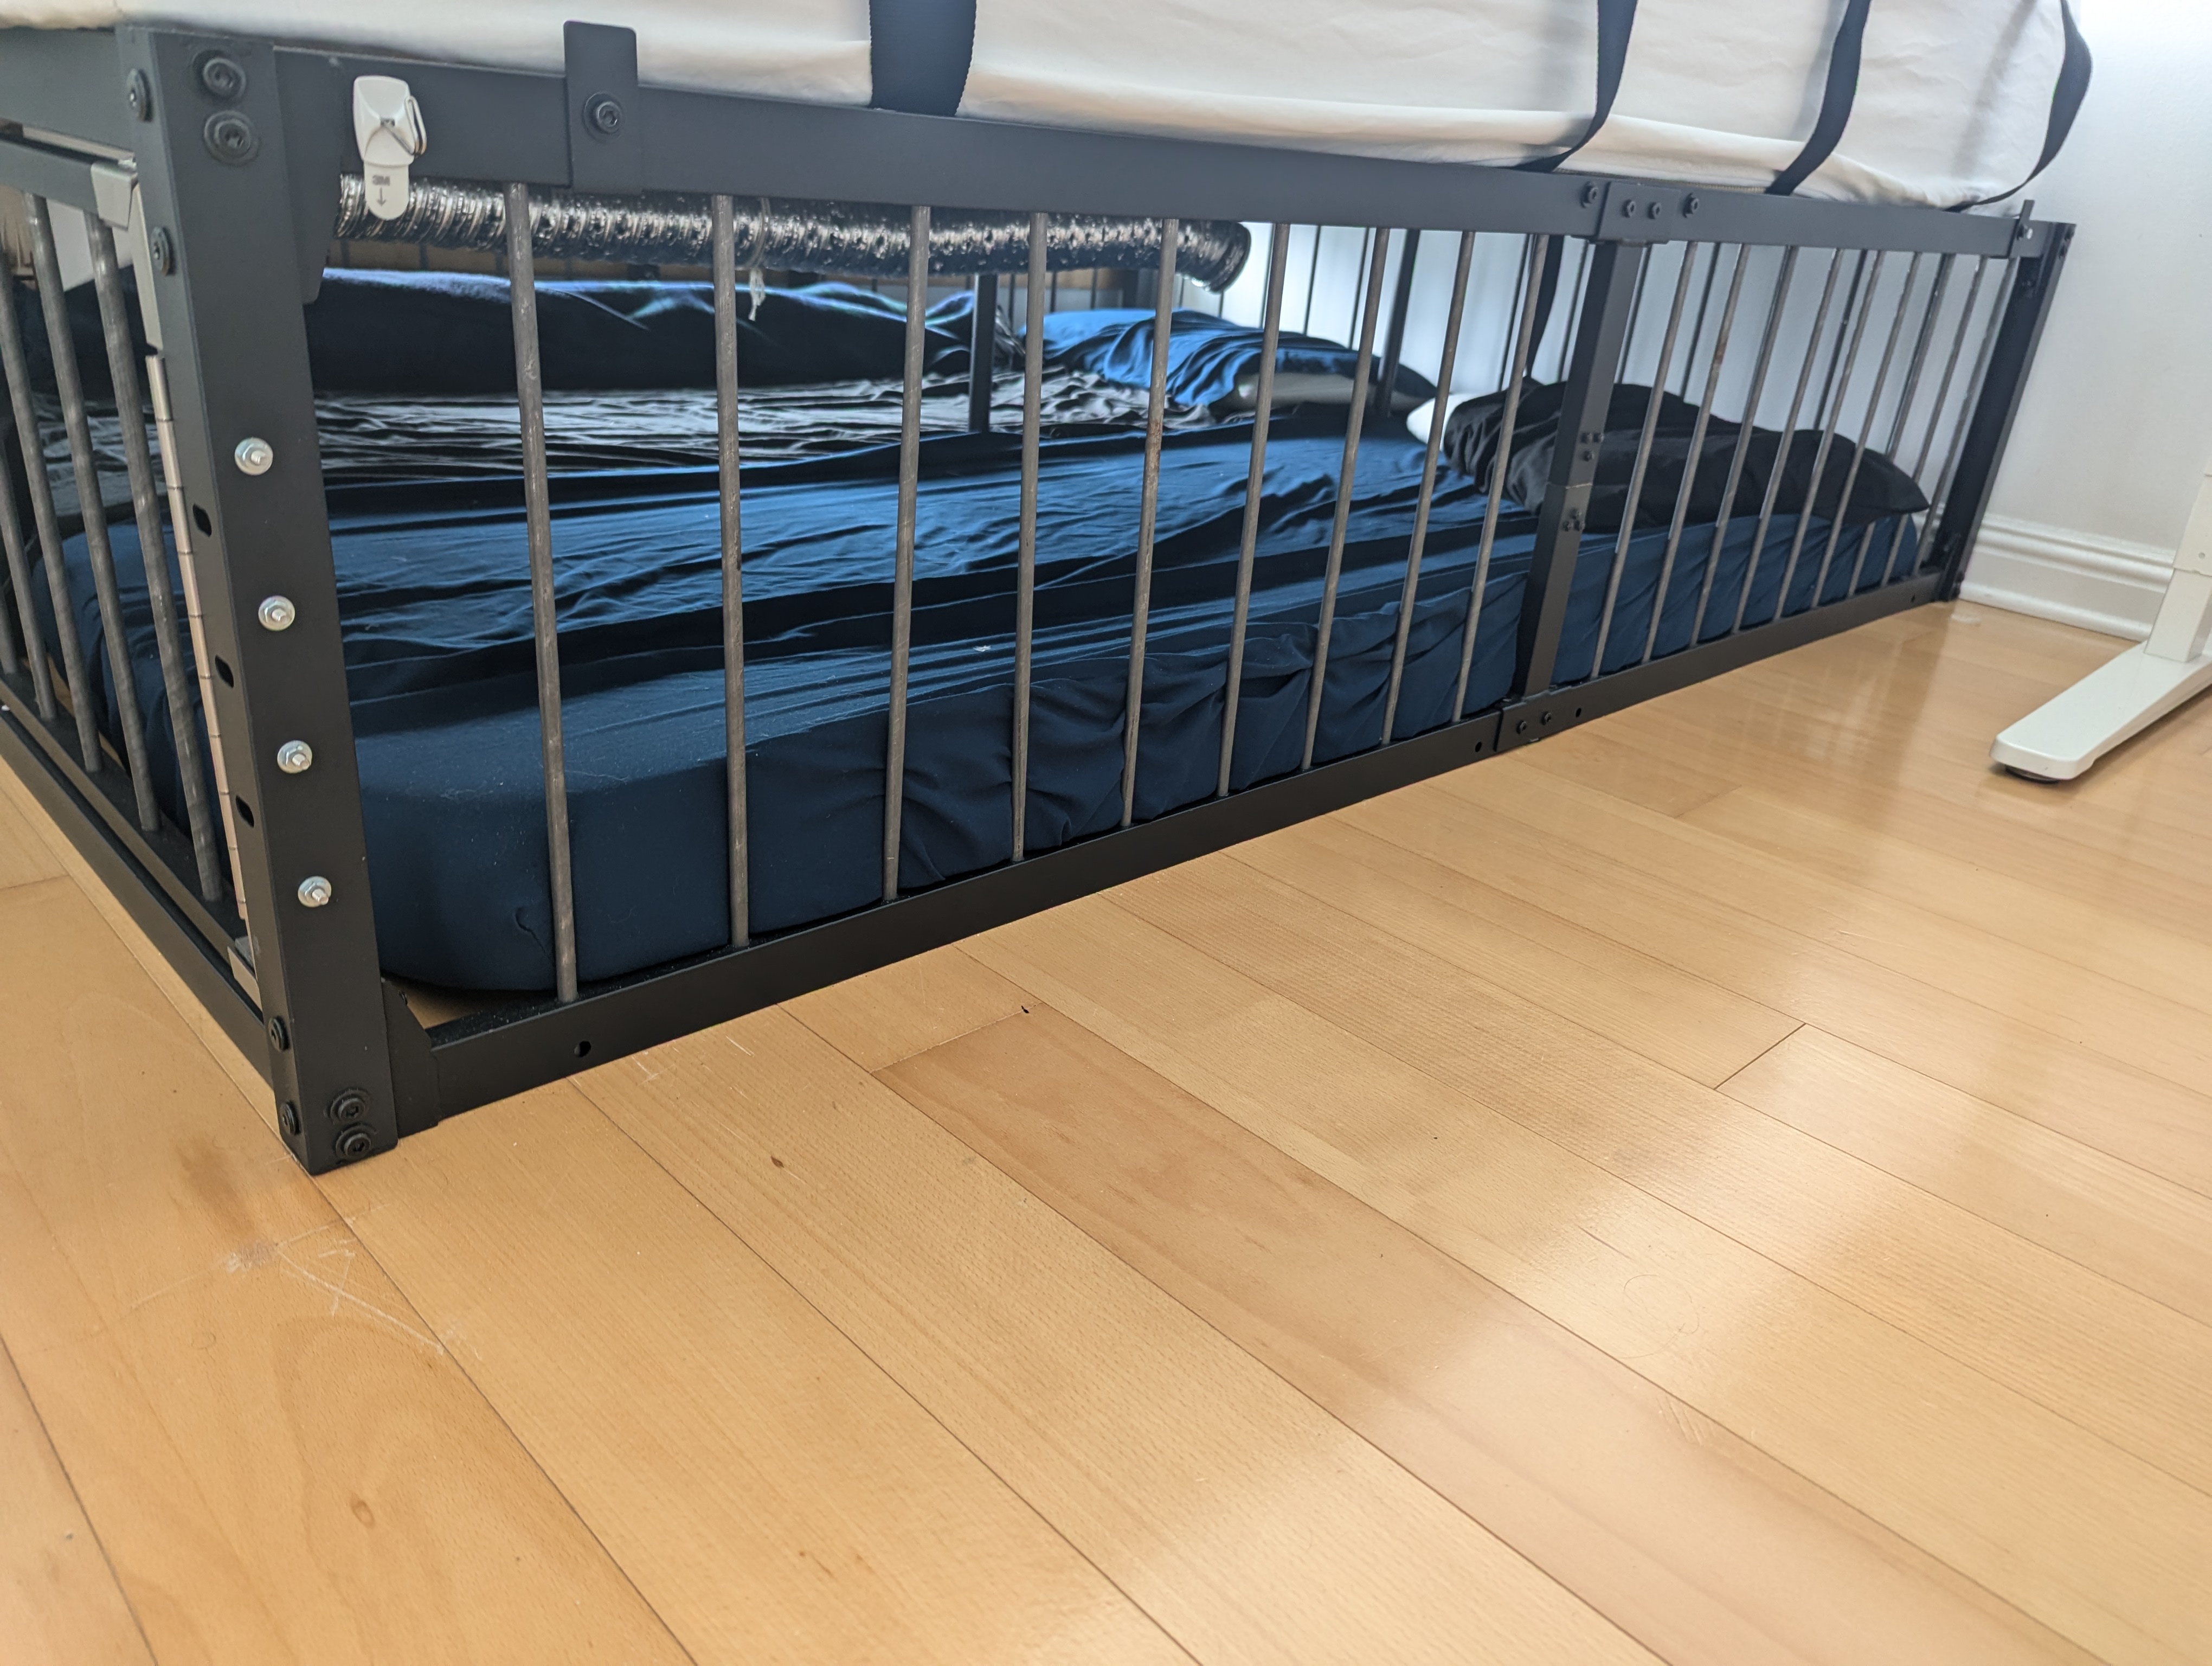
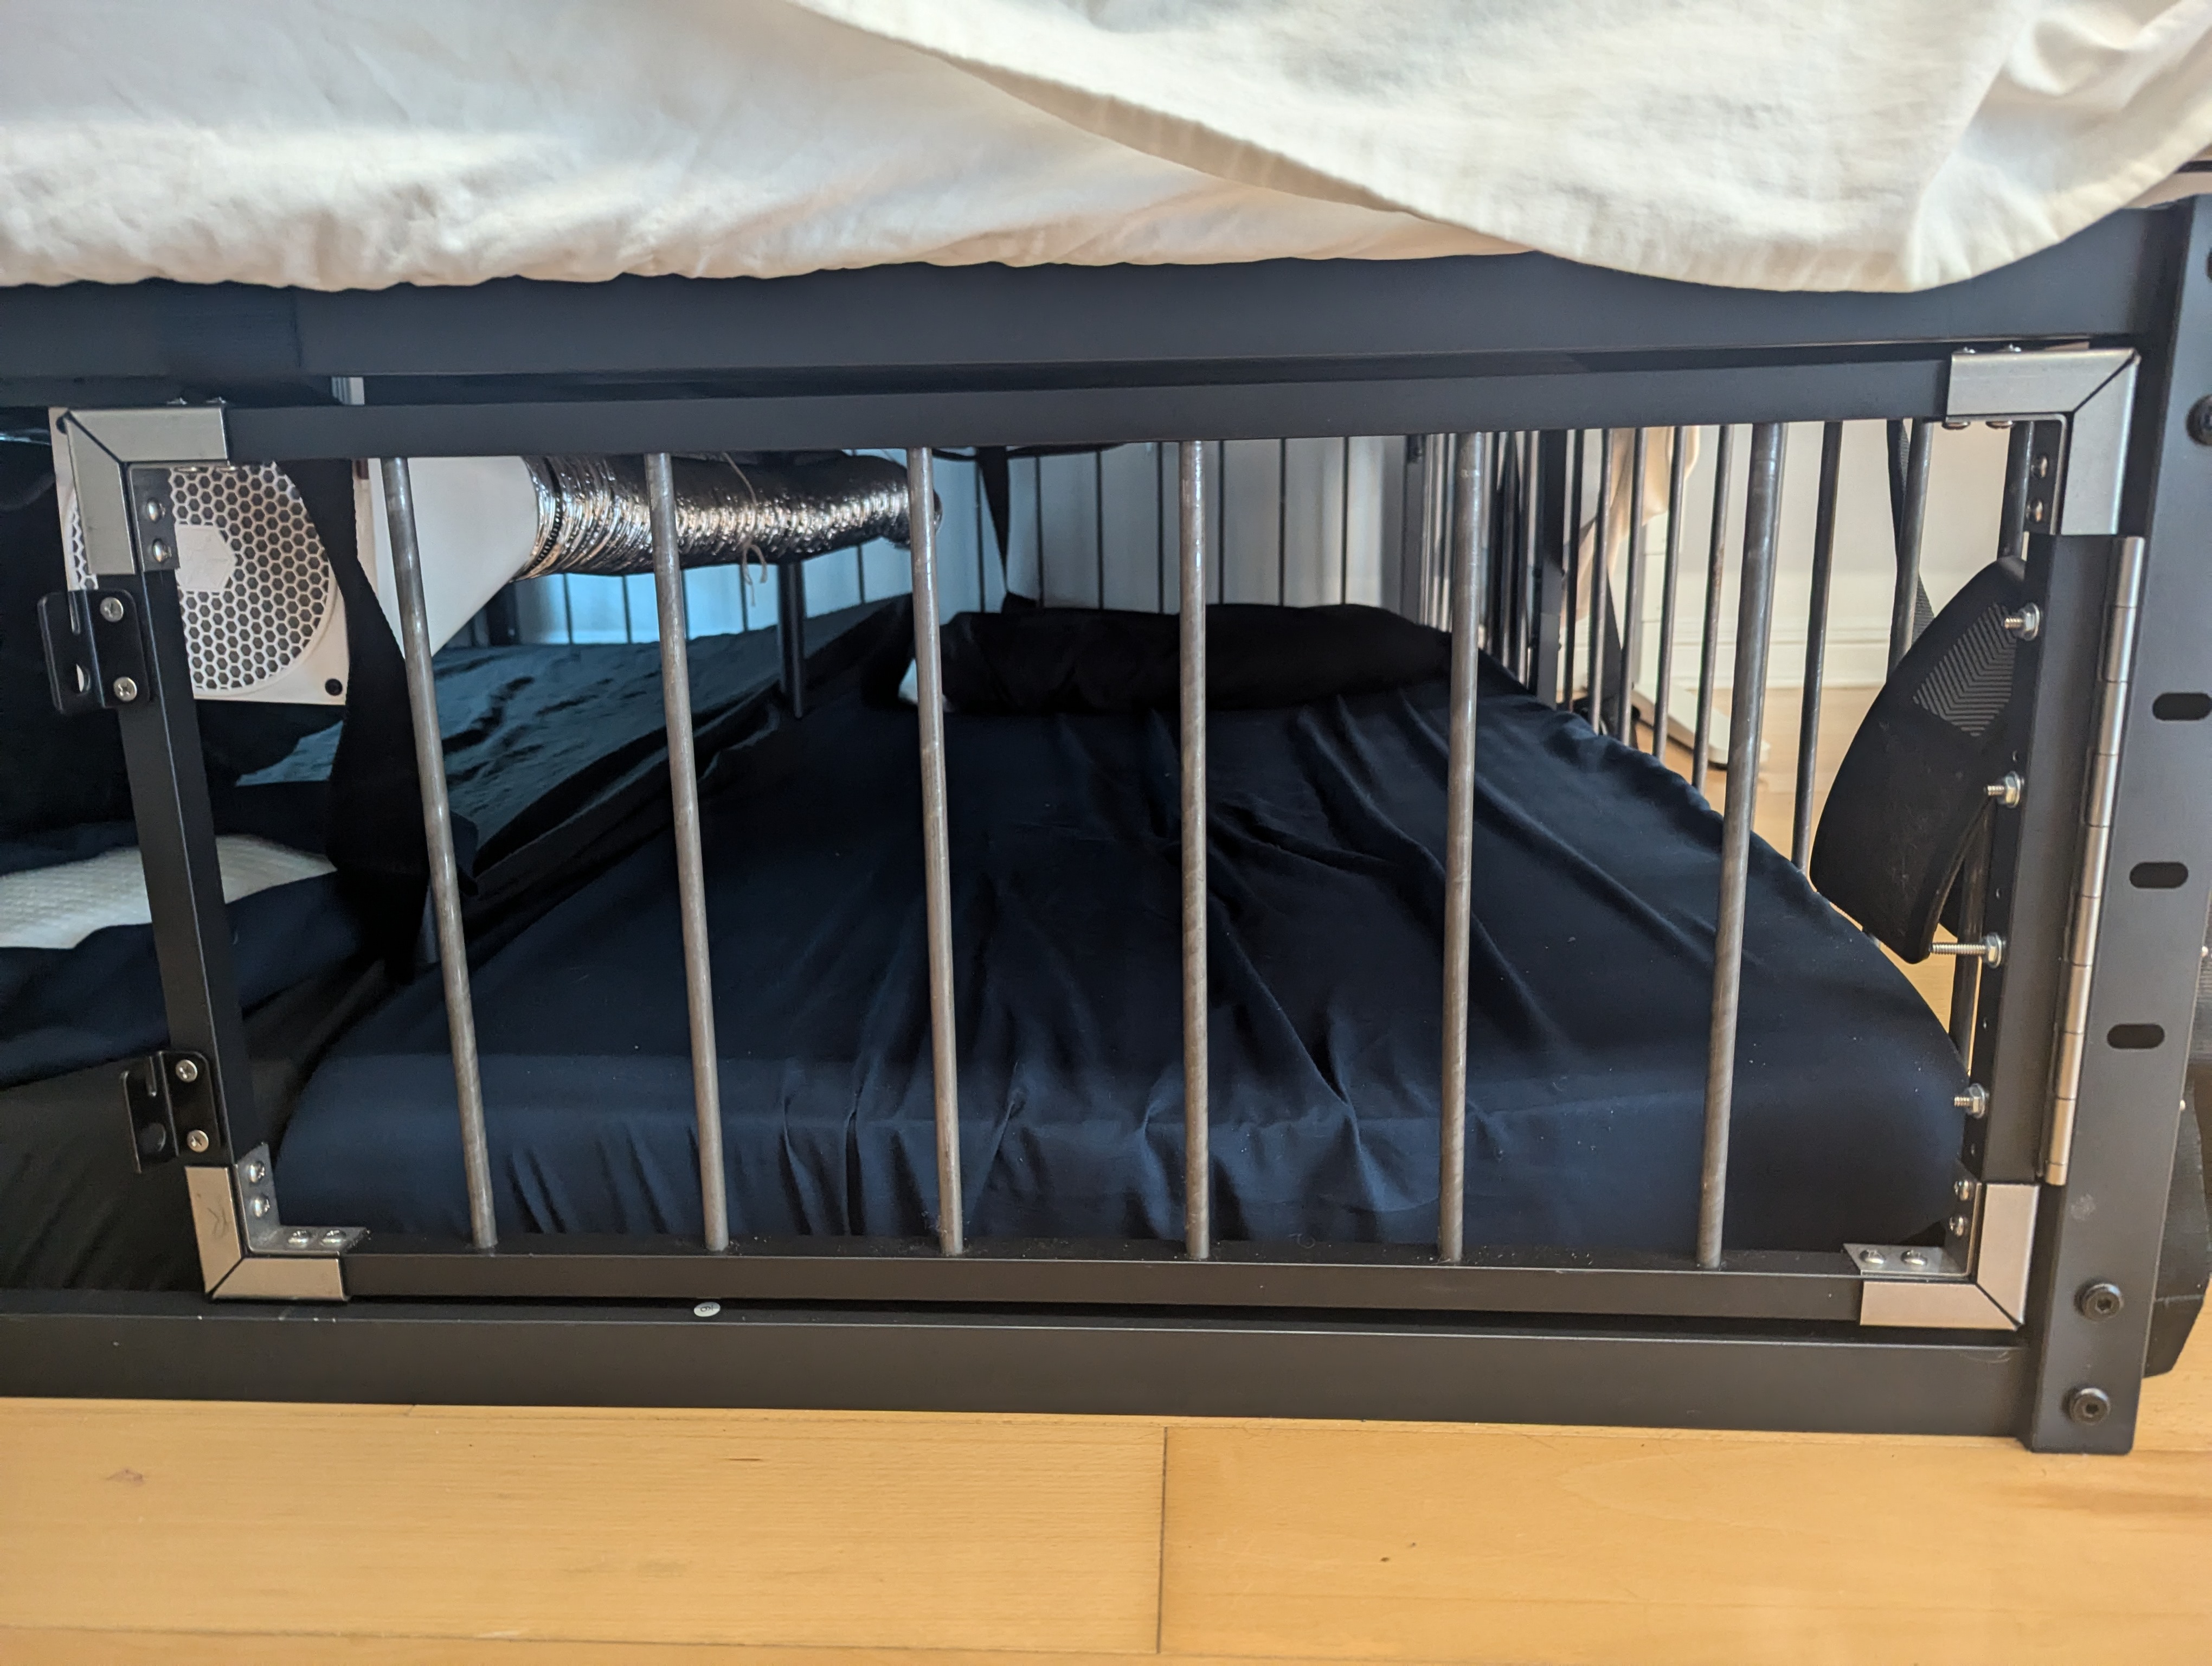
My cage is built into a normal(ish) 18-inch high steel bedframe and it's perfectly comfortable to sleep on.
Getting in and out of the cage can be disruptive for Master because I bump into the bedslats and He feels it through the mattress.
Security
It's pretty strong, but the bed slats aren't attached to the frame in any way so you can just push the mattress off the top of the bedframe and then remove the slats and exit. I have some ideas about how to attach them but I haven't done any of them.
There's also no bars or anything along the floor of the cage so even if the slats were attached you could get out by lifting the entire cage and going under it (if you're strong enough). This seems harder to fix because any bars along the bottom would take away from the already pretty limited space.
The doors are not very strong. There's a fundamental physical weakness because the two doors are attached to each other at a single point when locked, instead of having a long bar that passes through them, or having them attach to the frame, which would both be a lot stronger.
pet's comfort
There's about 16.5 inches of clearance between the floor and the bedslats. I use a 4-inch mattress topper so space is a bit tight. I can turn over comfortably and I don't have any claustrophobia problems, but if you're wider than I am (pretty average height and build, maybe a bit on the lean side) you might have issues.
The side to side width is also pretty limited. Each half is about 28.5 inches wide, which is almost 10 inches less than a twin. I don't have issues with it but I sleep in a hugsleep so I don't take up much space anyway.
There's obviously no room for a real mattress in this cage so you'll have to make do with a camping mattress or mattress topper. I don't have any noticeable sleeping issues just sleeping on the mattress topper but if you're considering building this for sleeping in I'd recommend buying the mattress topper first and sleeping on it for a few weeks to see if you can handle it.
Ventilation
Without active ventilation, the cage is stuffy, hot and hard to sleep in. For a long time I used a basic table fan I put on the floor and that worked fine. At some point I decided that wasn't good enough (the fan was loud and took up floor space) so I made a ventilation system built into the cage using a computer fan, some 3" ducting and some 3d printed parts. This works really well and provides ventilation for both sides of the cage.
Miscelaneous
The bars are kinda noisy when you bump them, cus they rattle around slightly in the holes. I can think of some solutions for this, like putting hot glue on the ends of the bars before you insert them into the frames, but I haven't tried that.
What you'll need
Components
Prices are how much it would cost to buy the exact products I used, at time of writing. Feel free to make substitutions. If you're worried about cost you can save a lot by using 1/4" bars instead of 3/8". Check for yourself if that seems strong enough for you.
Currently the clamp corners I used for the doors don't seem to exist anywhere. An alternative would be to buy square steel tube and weld your own doors together.
That's around 430$ for the cage itself. You can fit two pets in this cage, separated by the middle feet. For each side that you want to be sleepable you'll want
- A twin XL mattress topper (like this) (120$ but it was only 70$ when I bought it so probably wait for it to go on sale).
- A low-profile pillow (like this) (40$)
- Twin XL bedding & pillowcases
The ventilation system requires
- 3" x 8ft round aluminum ducting (like this) (15$)
- 5v 120mm computer case fan (like this) (20$)
- 120mm fan filter (like this) (8$)
- 4 x 45mm + 2 x 50mm M4 bolts and 6 nuts (like this) (8$)
- ~400g of 3d printing filament (~5$)
- 4 x 3" duct clamps (like this) (7$)
- Some zip ties or string
- Superglue
Tools
For the cage itself you'll need:
- A drill press (or a handheld drill and a lot of patience)
- Drill bits up to 3/8" (you might need more than one of each cus they'll get dull as you cut)
- A center punch
- A bandsaw that can cut metal (not strictly necessary)
- An angle grinder
- A belt sander
- A table saw
- Screwdrivers and wrenches for the screws and nuts you're using
You can probably get away without some of these, if you're missing a table saw or a bandsaw.
For the ventillation system you'll additionally need:
- A 3d printer
- A small Allen key
- A utility knife
Building
Terminology
The bedframe we're using consists of several pieces, which I will give names here for convenience. The counts and descriptions here are for the bedframe when assembled as intended. For several of these components, we will be using the parts from both sets.
- 4 corner posts which support the weight of the bed on the corners
- 2 end beams which connect pairs of corner posts at the head and foot of the bed
- 4 side beams which connect the head and foot of the bed (2 on each side, connected together in the middle)
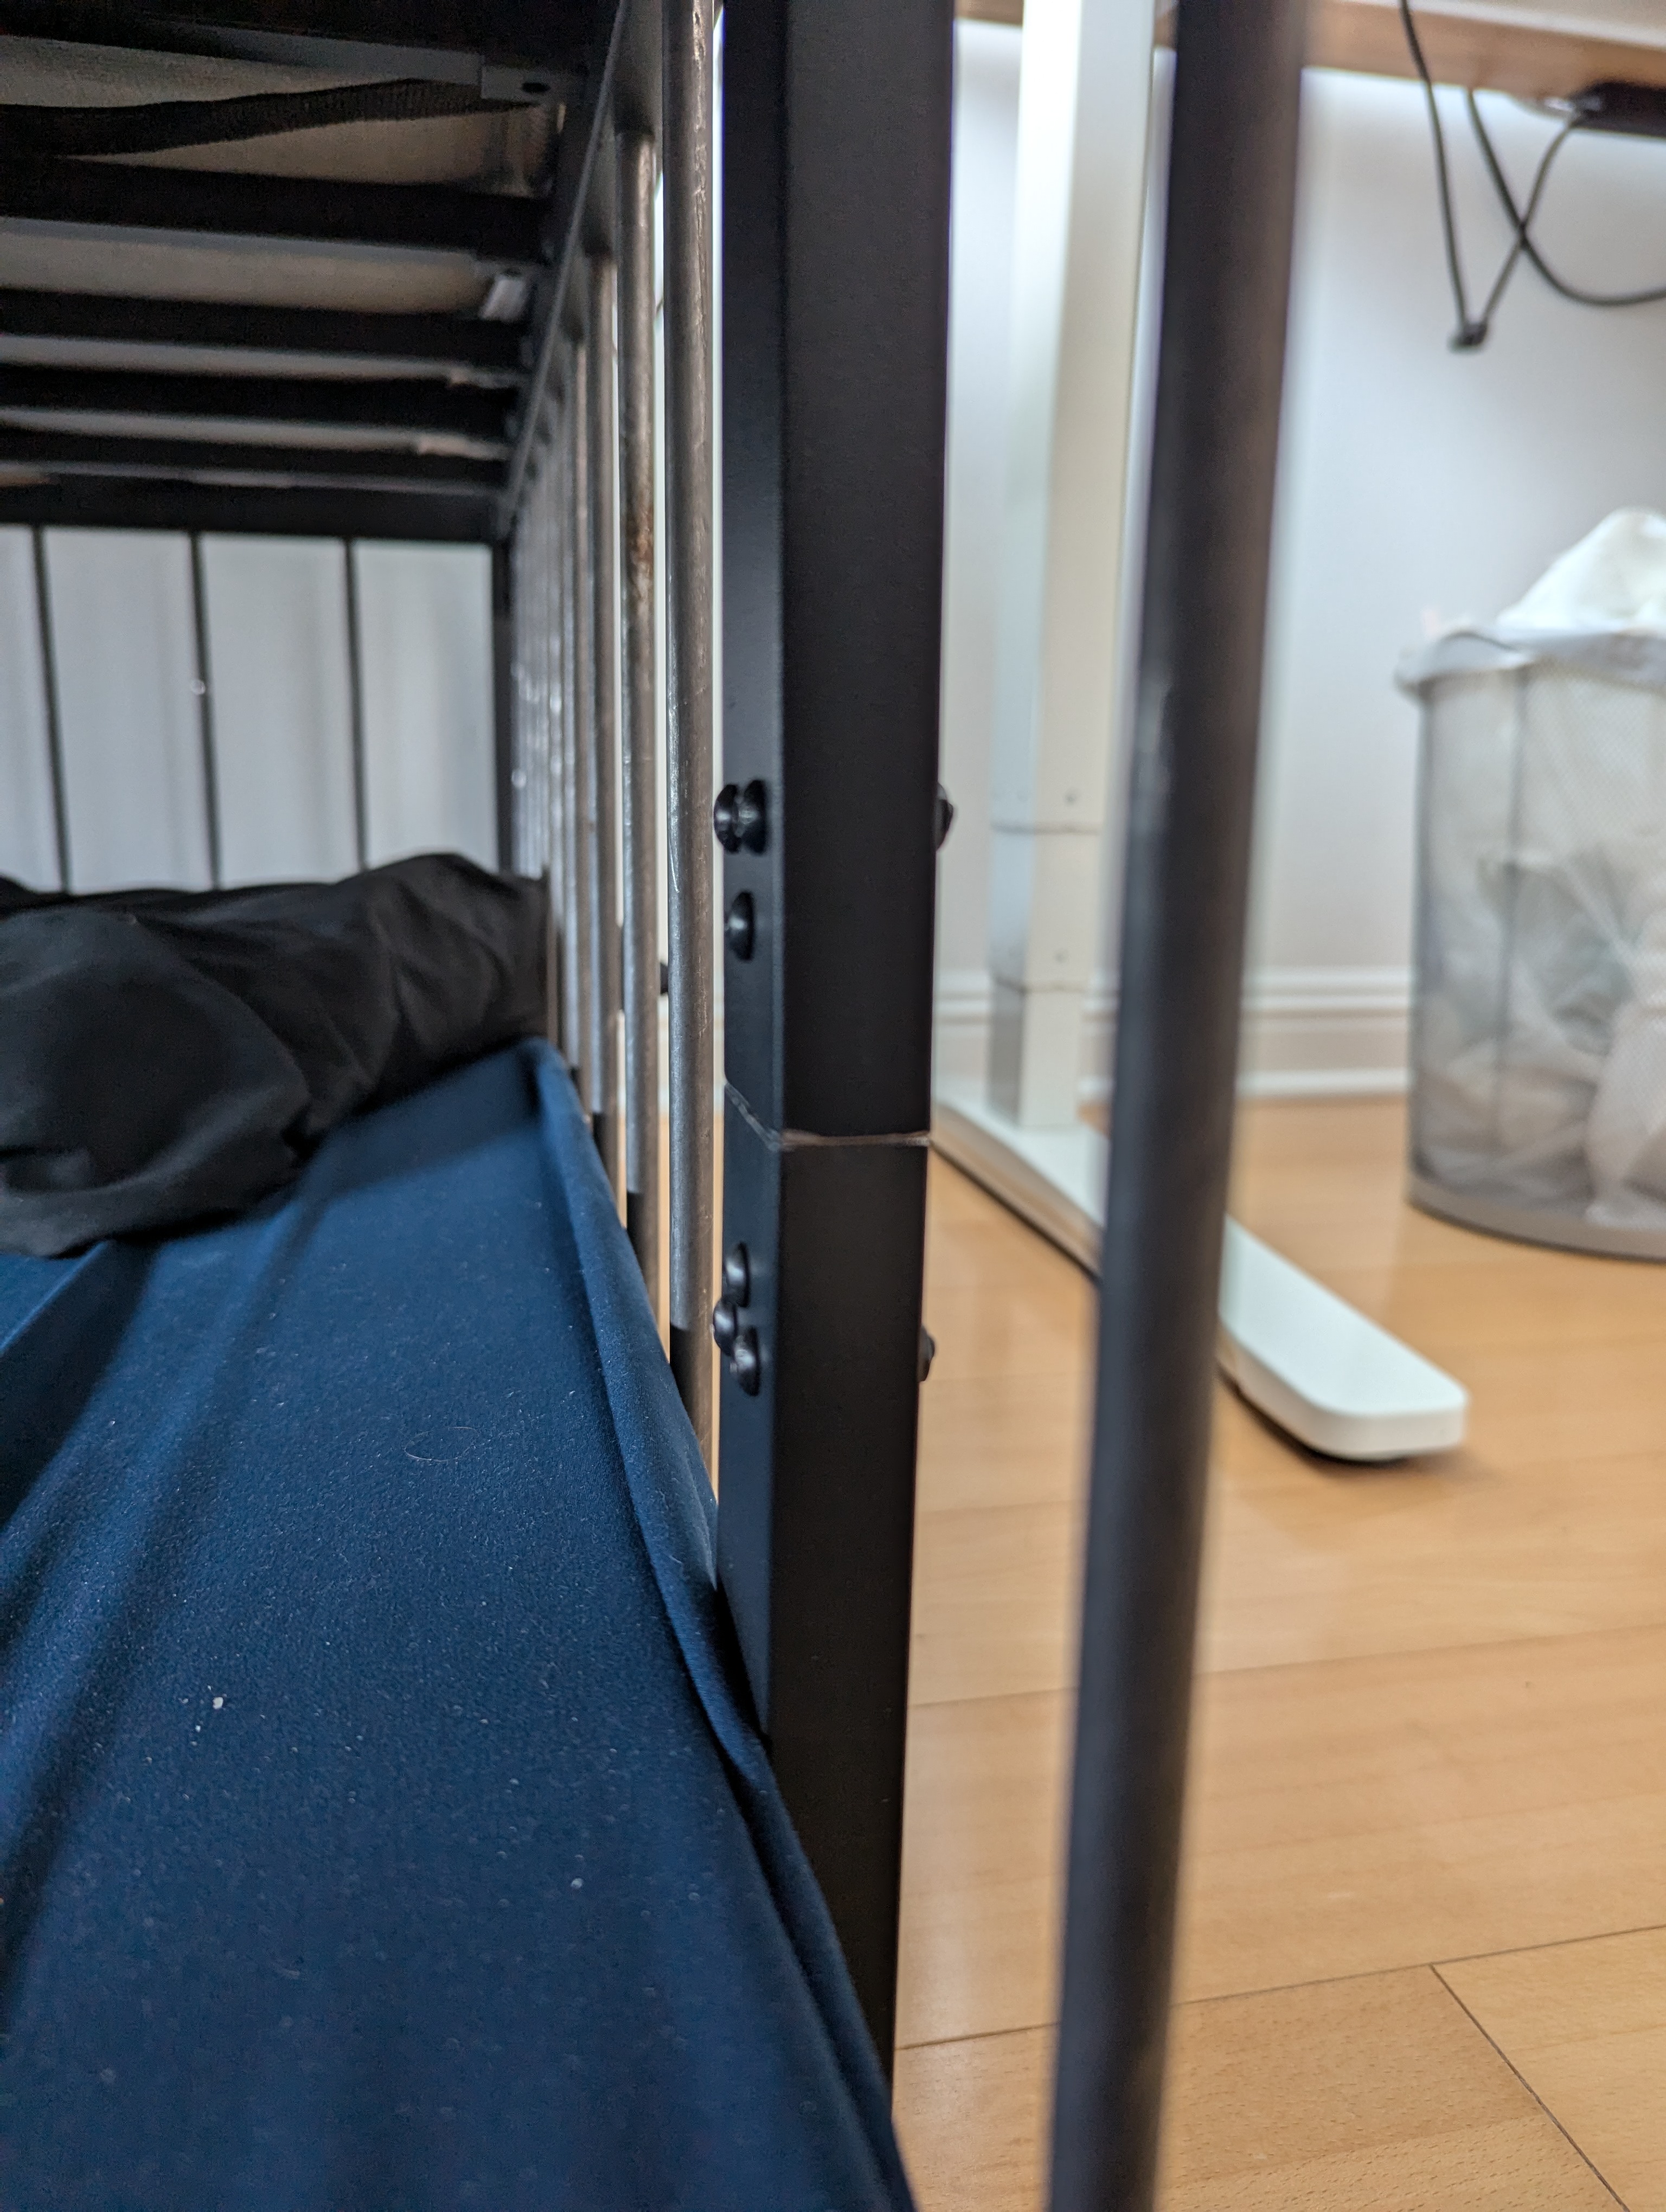
- 2 side posts which connect the pairs of side beams together and transfer weight from the side beams to the floor
- 2 center beams which run down the center of the bedframe from the head to the foot, connected to each other halfway down the bed
- 3 center posts which transfer weight from the center beams to the floor
- A bunch of bed slats which run from one side of the bed to the other, supported by the center beams and protrusions on the side beams
- Other components that aren't important
Before doing this project you should familiarize yourself with the bedframe and the instruction manual that comes with it. I would recommend fully assembling it normally to get a good understanding of how the pieces fit together.
I have included some measurements here, but don't rely too heavily on them. The details of the design of the bedframe may have changed since I made mine, or you might have bought slighty different components. I also may have gotten some things wrong. Between buying my first frame and the second 9 months later I've noticed at least one difference in hole placement so be careful.
Cage body
Drilling holes
Throughout this project, you're going to need to drill a lot of holes. You want to use a drill press for this. If you don't have a drill press, you can do it with a handheld drill, but this will result in the following problems:
- Your holes will not be positioned correctly because the drill will move as you get it started
- The drill will catch in the hole, suddenly wrenching your hand and potentially damaging the drill bit. Also once this happens it's really hard to get the hole finished because it will keep catching instead of drilling
- The holes will be oodly shaped as your hand wiggles around trying to keep the drill straight
- Your arm will get very tired
I drilled a lot of the holes for this project with a handheld drill. It sucked.
Either way, whenever you're cutting metal, you want to use lubrication, preferably a proper oil lubricant but vegetable oil worked for me in a pinch.
When drilling holes, first use a center punch to mark the hole. This will make your life a lot easier and make the placement of your holes much more accurate. If you're drilling a hole over 1/4", first drill a 1/4" pilot hole, then do the full size.
Drilling is going to produce a lot of metal fragments. These metal fragments will tear up your clothes and get stuck in your feet (and probably do worse things to your body). I lost at least one good shirt this way. This is another reason to do this in a workshop/makerspace/friend's basement if you can. You'll need to use an angle grinder and bandsaw anyway so find or make a friend with some tools and a cement floor!
You're also going to end up with a lot of oil and metal shavings stuck inside the frame of the cage. These will slowly fall out through the holes in the frame and be annoying and gross and possibly unhealthy. To avoid this, you can wash the finished posts/end beams with soap and water, being sure to get lots in the holes and shaking it up a lot, then fully dry it out with a hair dryer before assembling the cage. I only started doing this at the end of my build but I think it's worthwhile.
Bandsaw
A sharp bandsaw will cut through thin metal like butter, but if your metal is too thick you'll ruin the blade and get nowhere. When cutting metal tubes (like the side posts and bed slats) on the bandsaw, you're going to want to start your cut with the metal tilted at 45 degrees from the horizontal so that the bandsaw isn't cutting the full flat face of the tube at once.
Corner posts
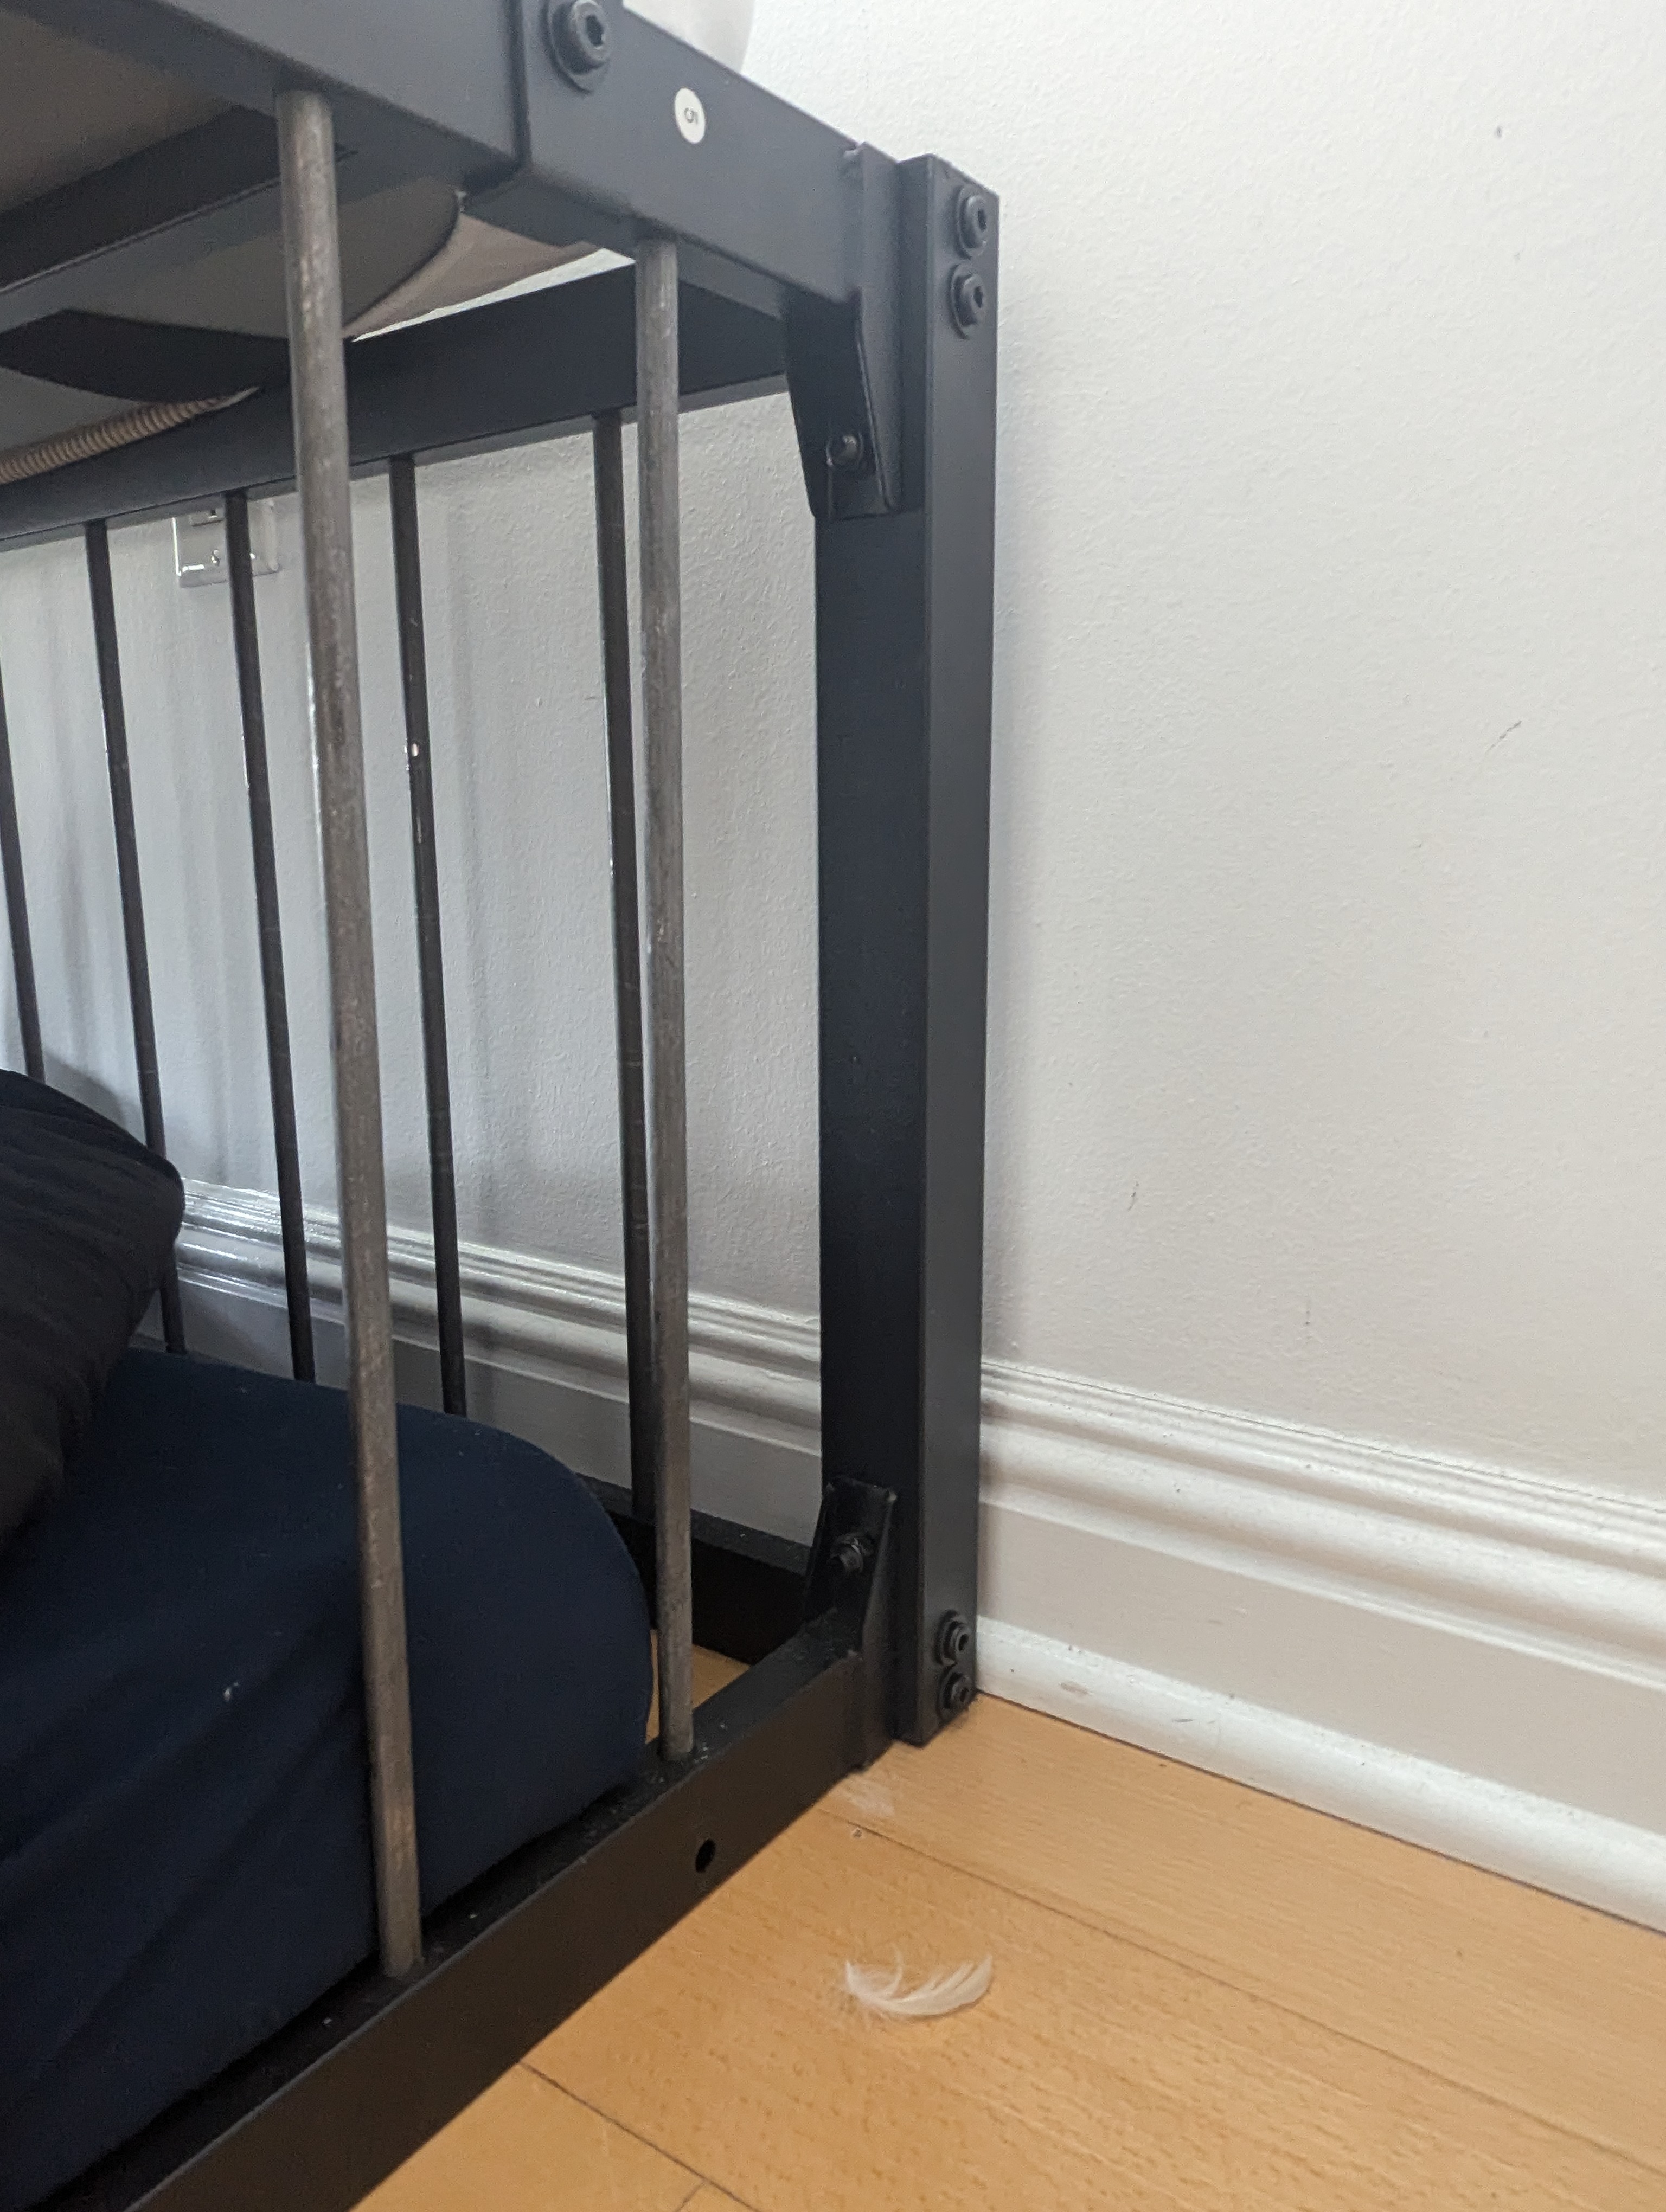
In the original frame, the end beams and side beams screw into the corner posts through holes at the top of the corner post. We're going to be adding another set of end beams and side beams that attach to the bottoms of the corner posts. This means we're going to need to drill holes at the bottom of each corner post matching the holes at the top. Measure the position and diameter of these holes and make matching holes measured from the bottom of the corner post. The corner posts have a metal foot that extends into the corner post where these new holes will go. I would recommend removing the plastic foot, drilling the initial holes in the metal, cleaning all the metal chips out of the post, then reinserting the foot when you're done and running the drill through all the holes again to put the necessary holes in the plastic.
Side beams
Drill a series of equally spaced 3/8" holes in the bottom of each of the 8 side beams using the drill press. In my experience the bars were often slightly larger than the holes produced by the drill press Use a bar to check the fit in each hole. If a bar doesn't seem to fit, force it in a few times to enlarge the hole. Wiggle the bar around a little while it's in the hole to widen it a bit more until it fits comfortably (to account for variability between bars).
End beams
Do the same as above but with 2 of the end beams (the two end beams on the door side of the bed will not need holes so don't drill any). The end beams are symmetrical and all identical so don't worry about which side you're drilling the holes in.
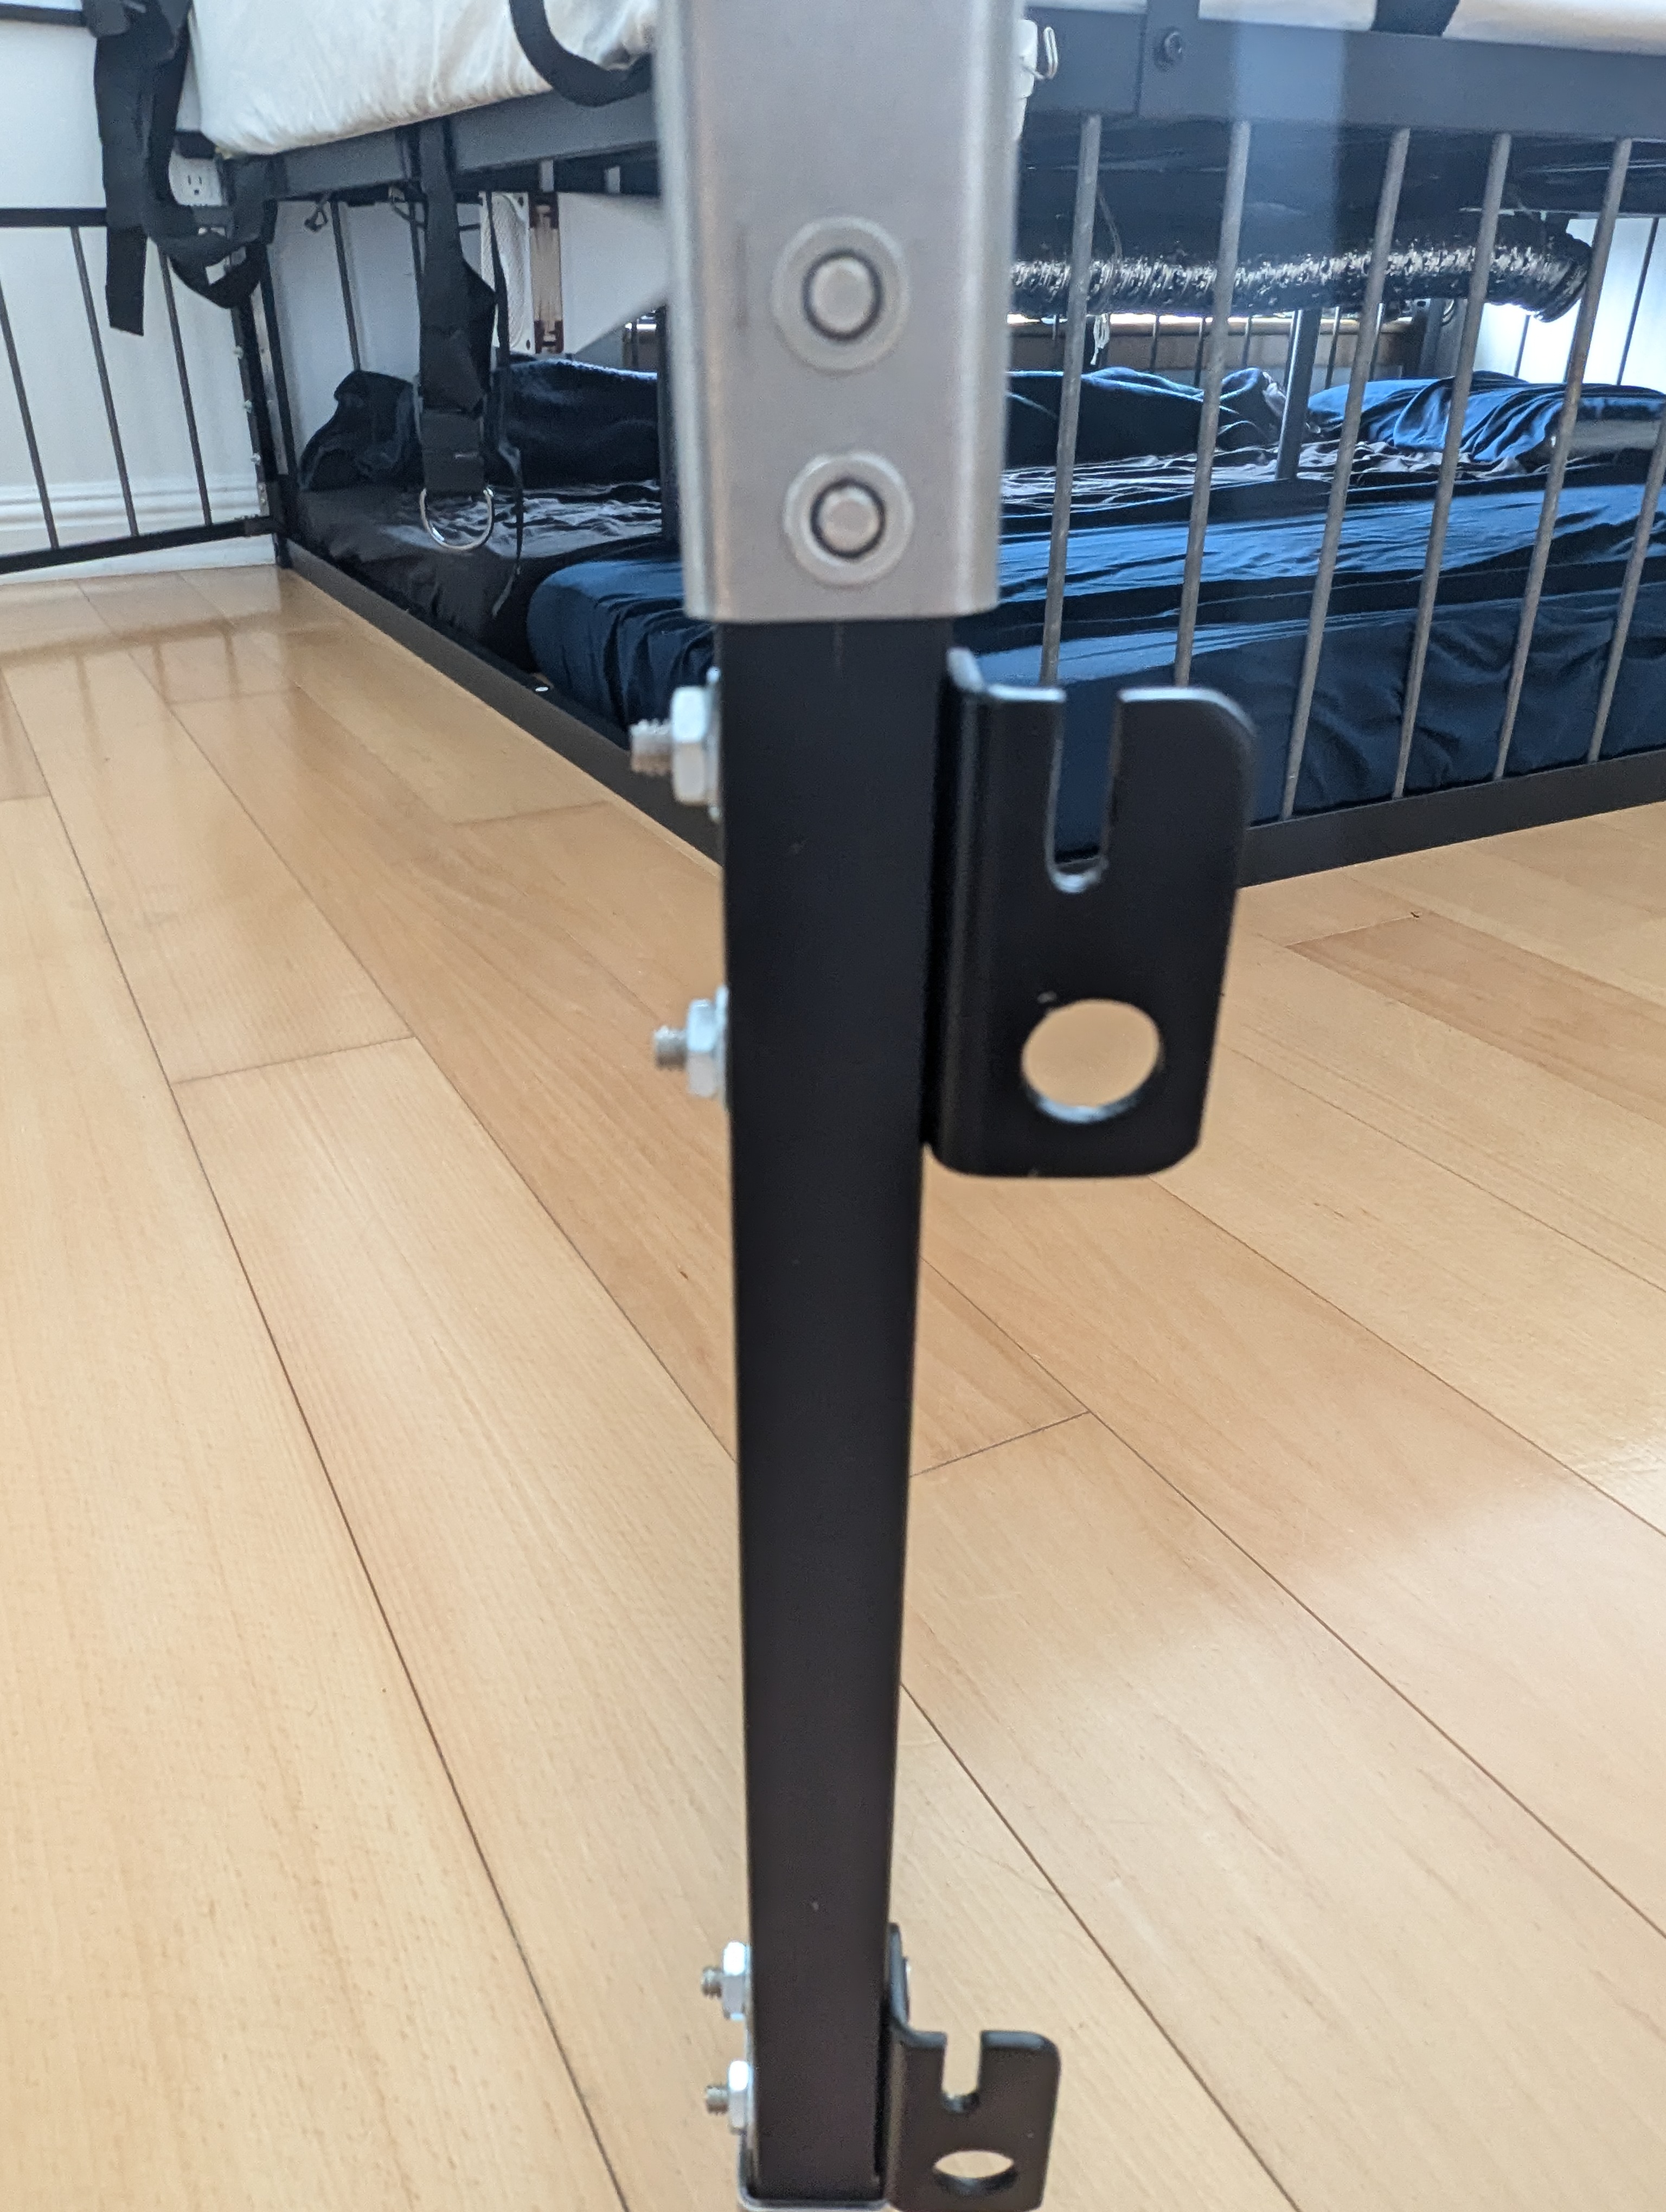
Side posts
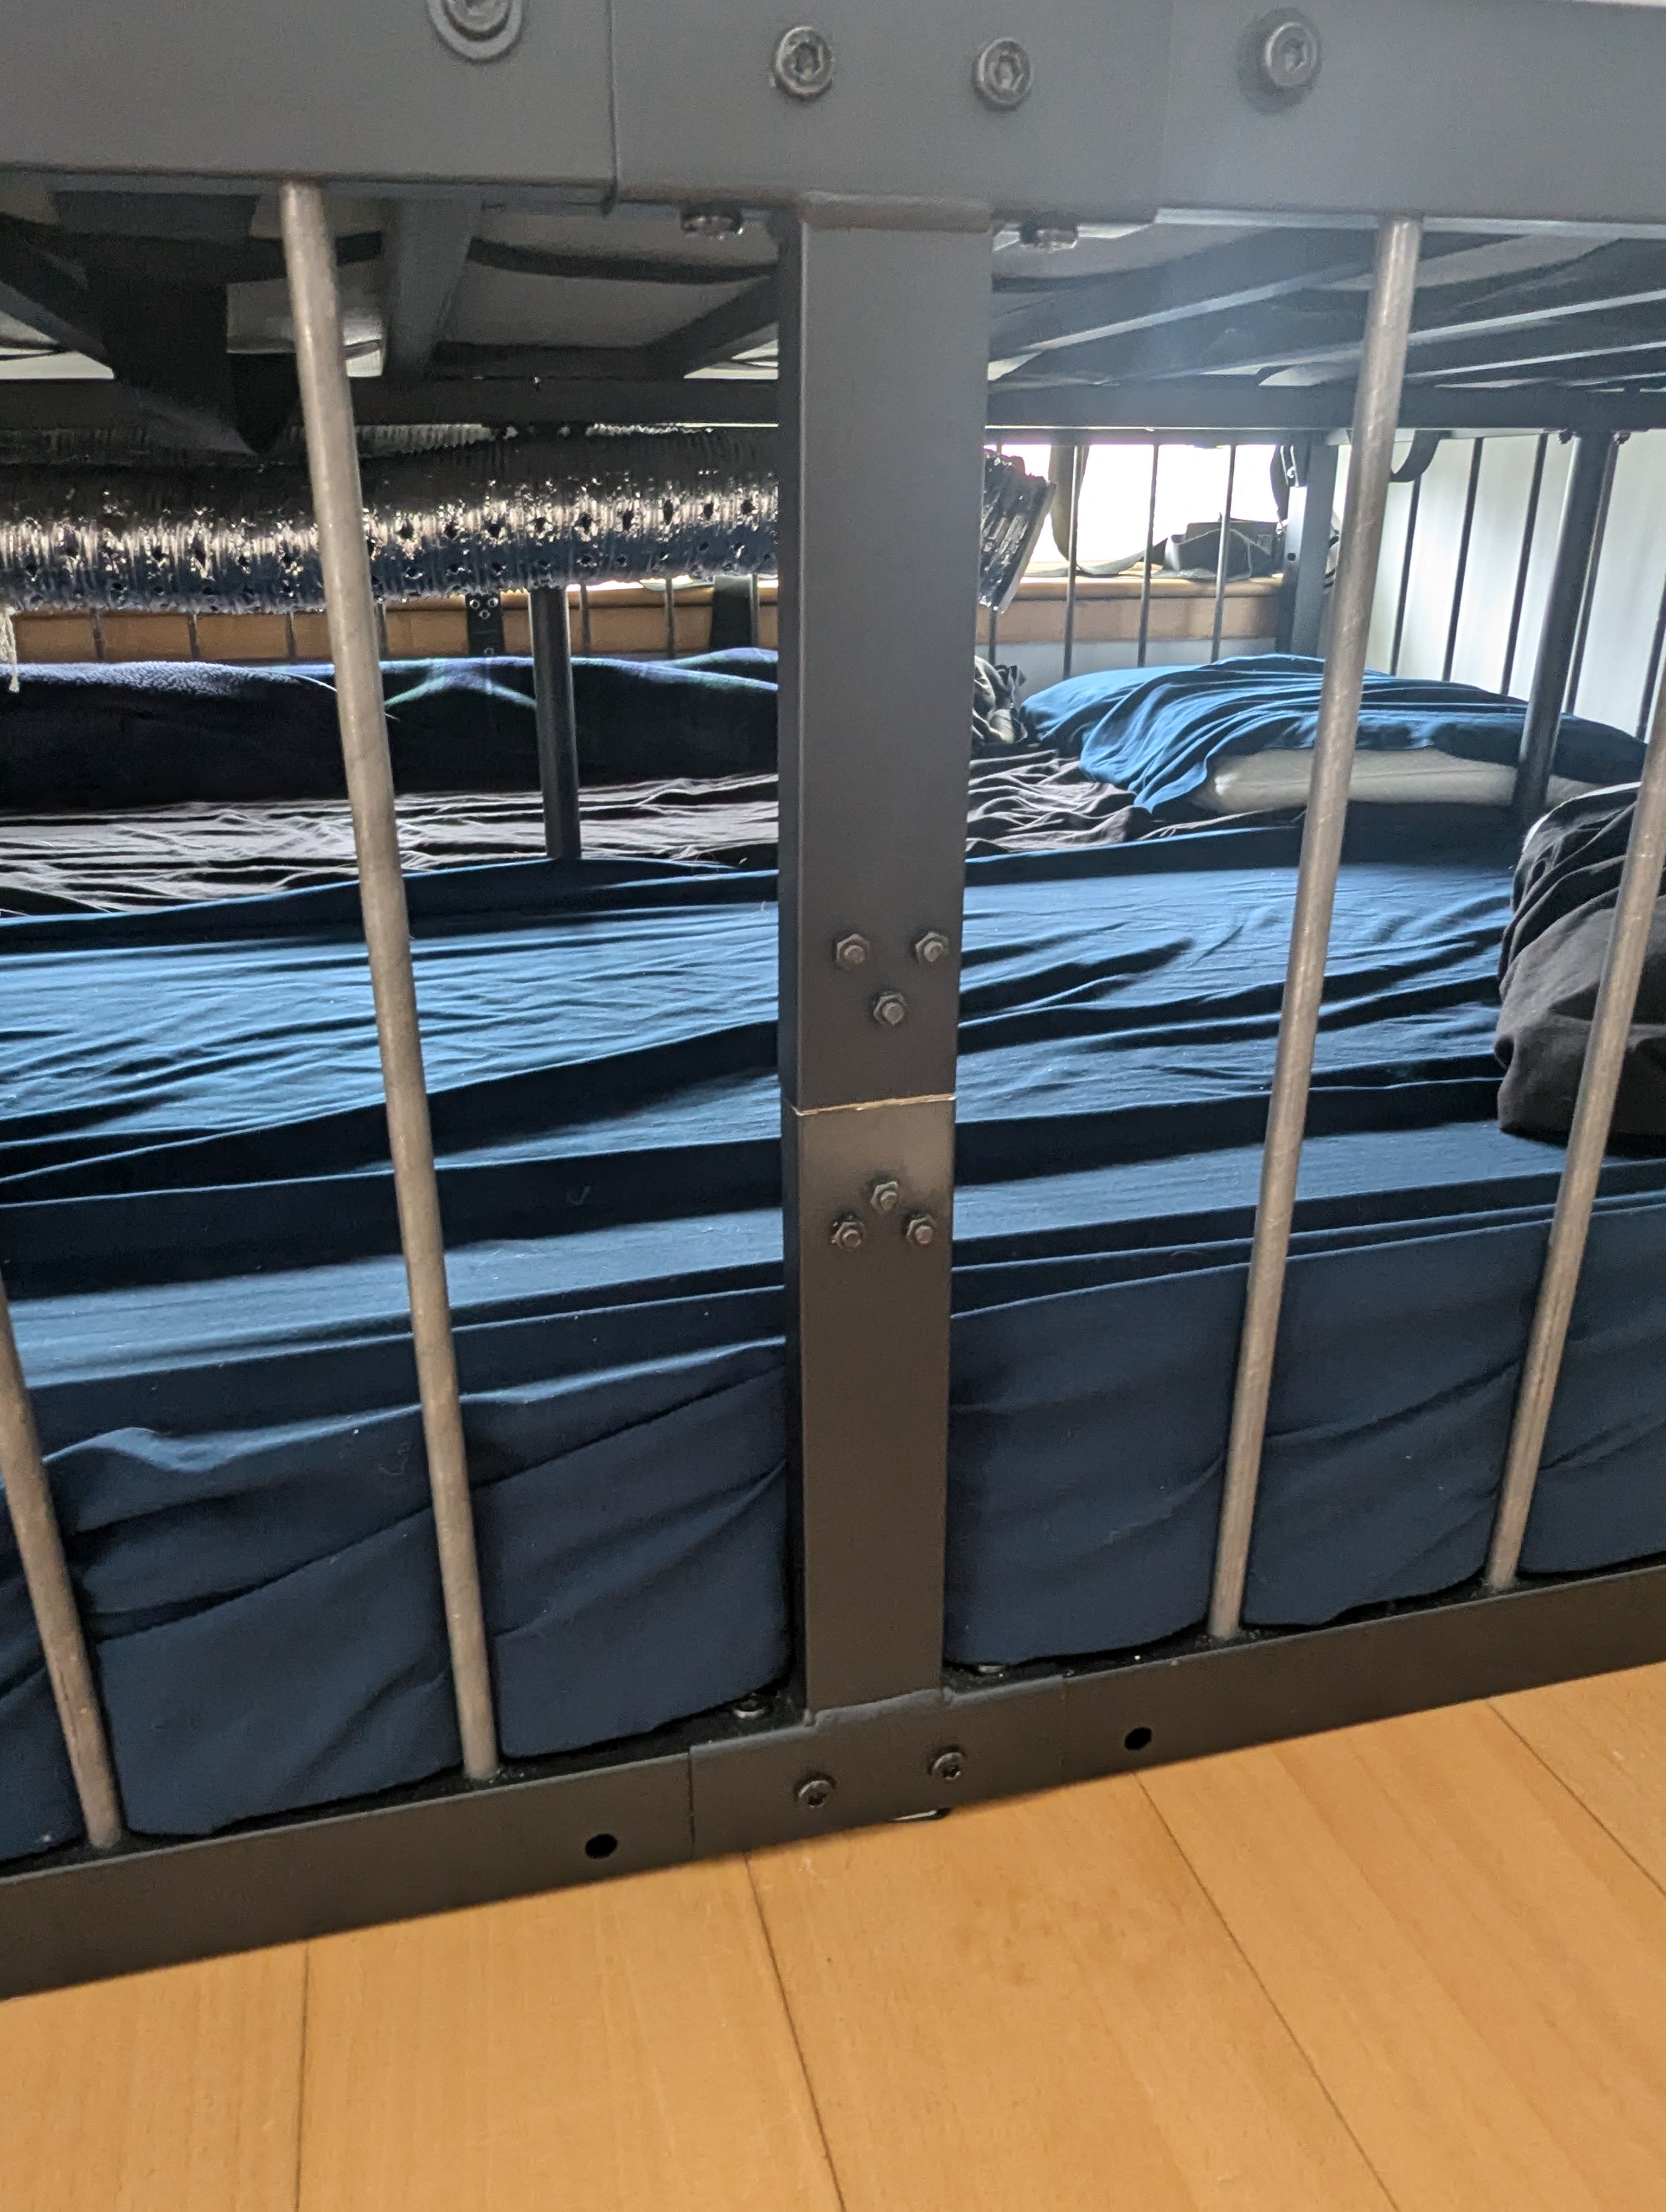
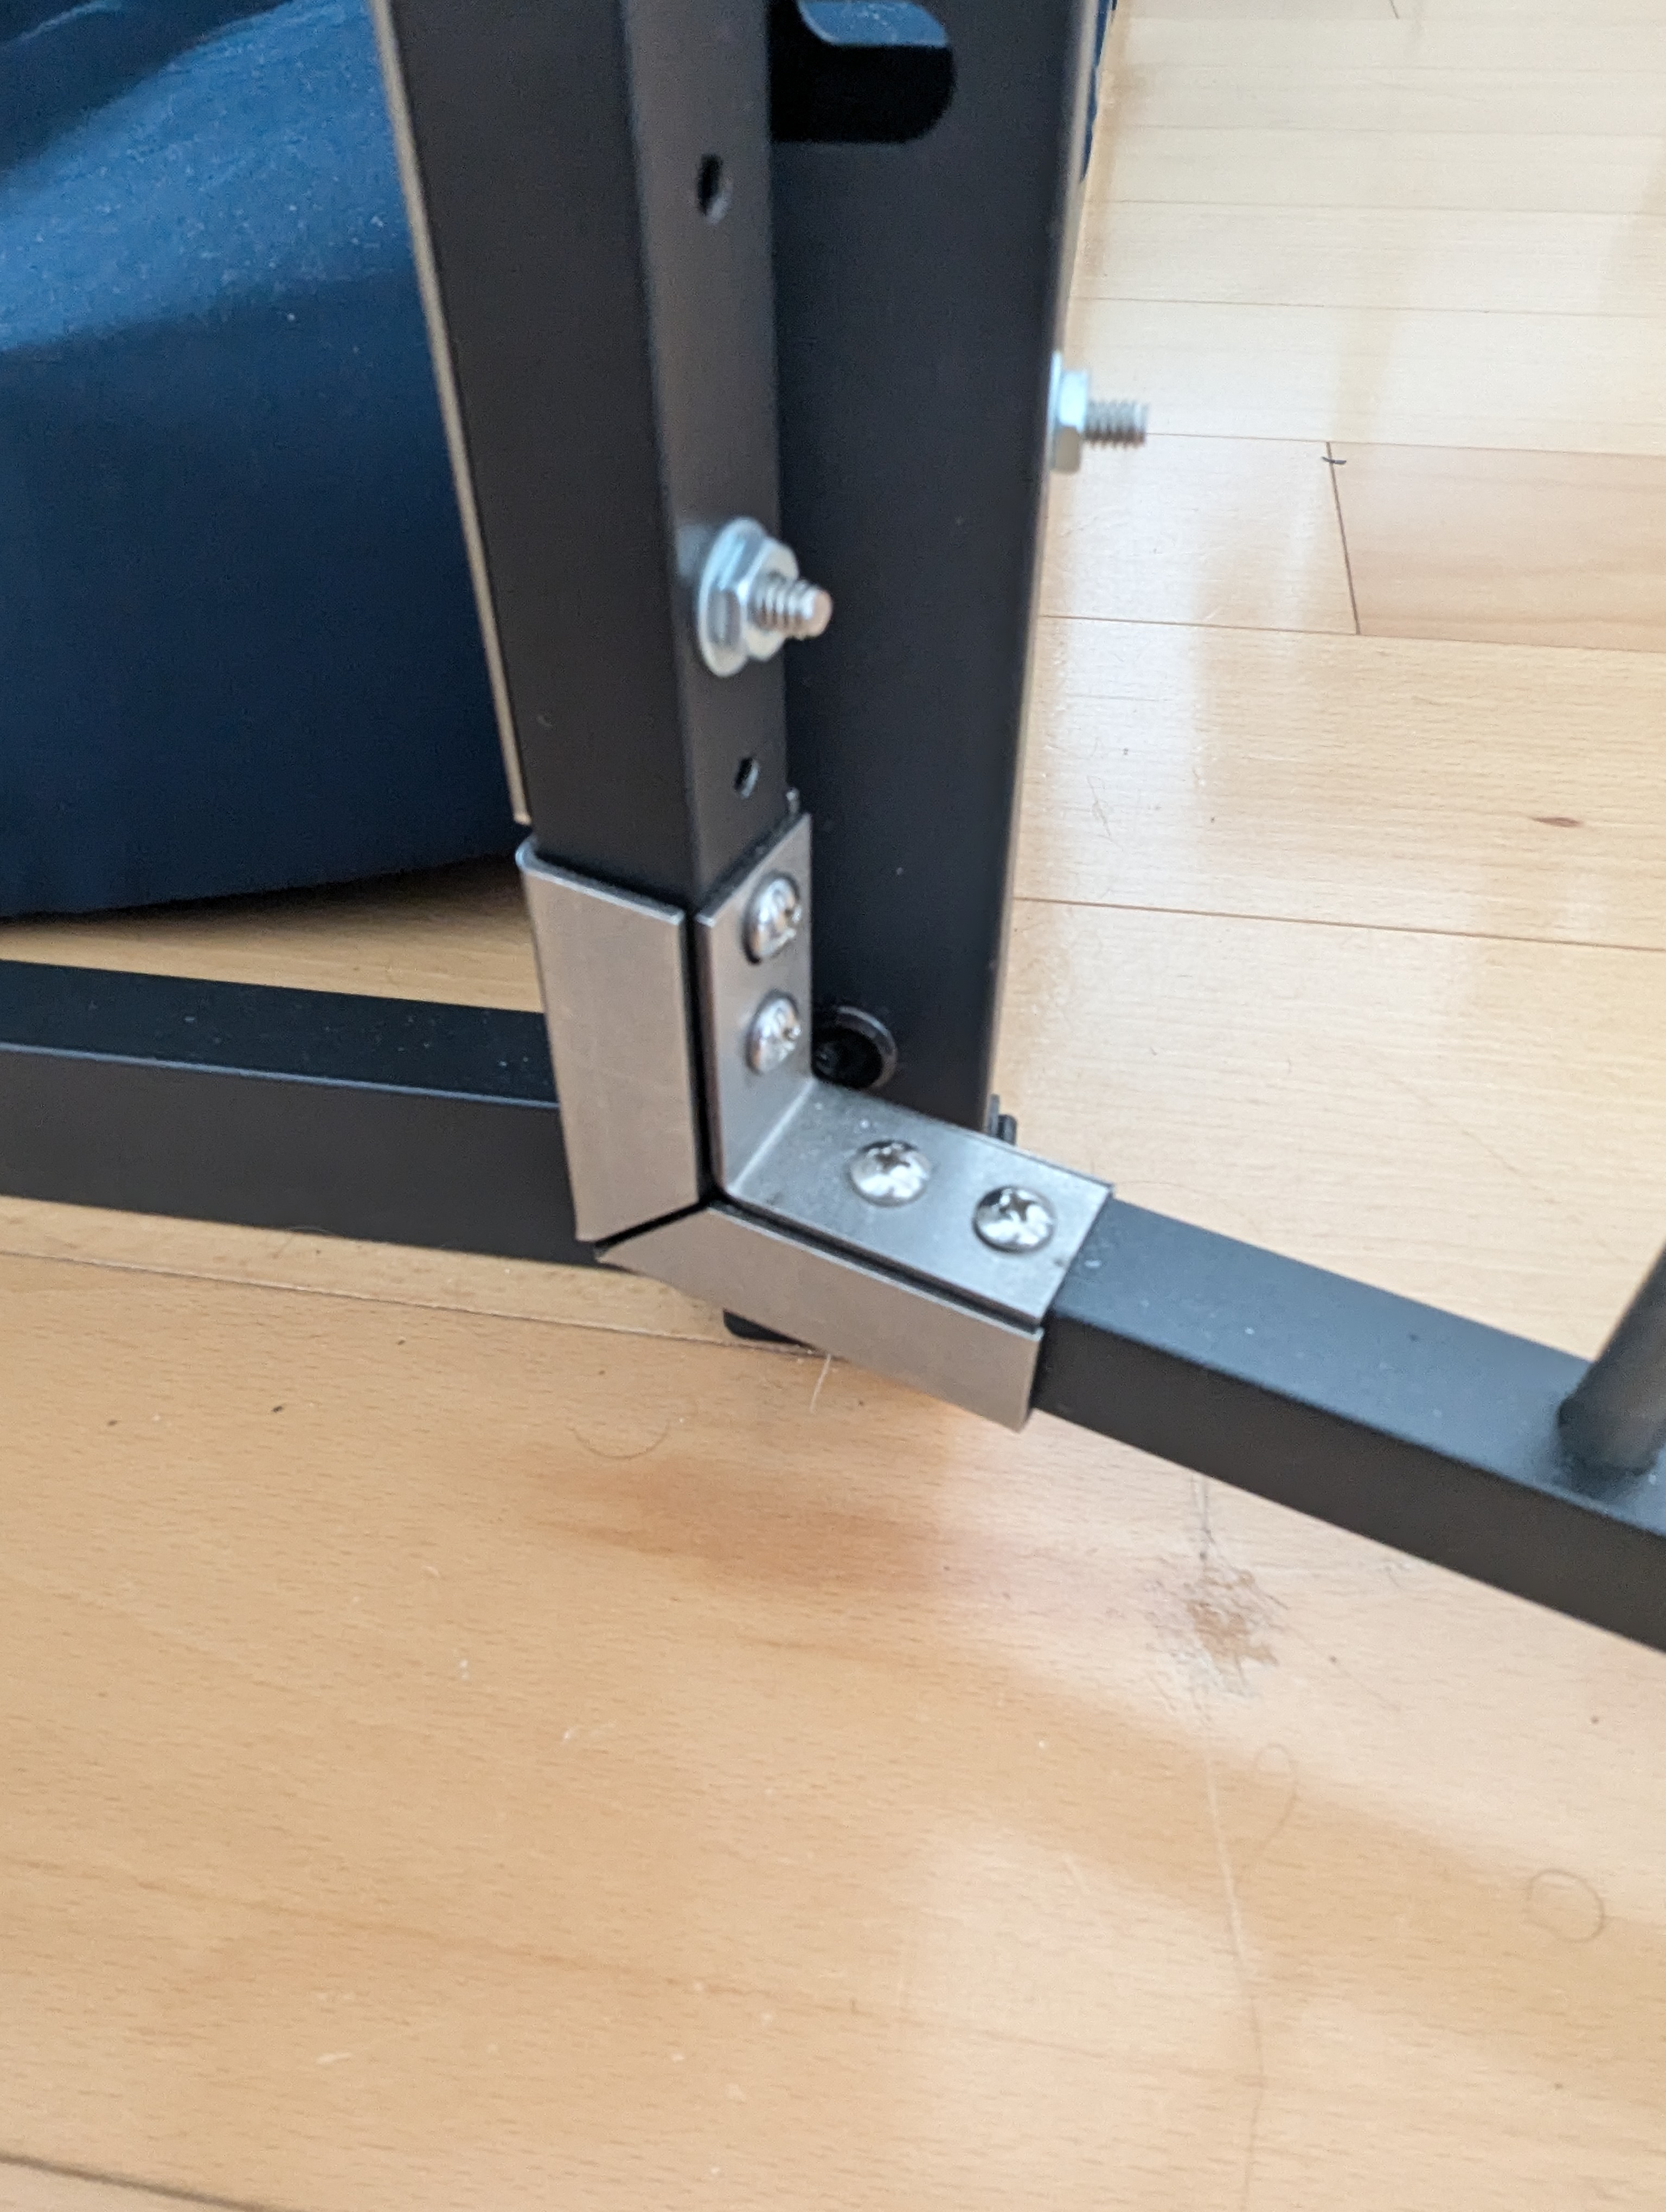
Normally, the side post would extend from where the two side beams meet down to the floor. But we're putting another pair of side beams along the floor which will get in the way of this. Also, those bottom side posts need something to attach them to each other. So we're going to cut each pair of side posts and attach them to each other.
First, figure out how you're going to need to cut the side posts. Attach a top and bottom side beam to one of the corner posts and measure out the distance between them. You're going to cut each side post to half this length (remember the thickness of the metal!) In my case this was 7 3/8" measured from the inside surface of the side post. Mark this line on both side posts. Cut along this line with the bandsaw.
We need some way to attach these side posts together. To do that, we're going to use a piece of wood that extends into each side post.
Get or cut a piece of wood at least 8" long (the longer the better, as long as it'll fit) and at least as thick/wide as the inside dimensions of the side post. Cut it down to a little more than the dimensions of the side post using the table saw. Check the fit. Shave down the sides of the wood with a belt sander until it fits snugly in the side post.
With a drill press, drill 3 holes all the way through each of the side posts, near the bottom. Draw a line halfway down the piece of wood and insert it into one of the side posts up to this mark. Run the drill through the 3 holes again to put holes in the wood. Run bolts through these holes into nuts on the other side and tighten them to clamp the wood and metal together. Insert the other end of the wood into the other side post and do the same, so that the two side posts are fixed together with the wood into a single piece.
Bars
You're going to need a total of 64 bars for this: 52 17.5" bars (remember to measure yourself to make sure!) for the fixed sides and 12 13.5" bars for the doors. Take your bars, mark them with a sharpie or something, put them in a vice, and go to town with an angle grinder. Careful about the sparks: wear a welding apron, or at least long pants you don't care about too much.
Assembly
You're going to follow a modified version of the bed's included assembly instructions. Remember not to fully tighten the screws until the end of the assembly process.
For each corner post:
- Install a bottom side beam
- Put a bar in each hole in the bottom side beam
- Install the top side beam. This part requires a lot of fiddling and awkwardness to get all the bars in all the corresponding holes all at once
For each side of the bed, stick two of these side assemblies together with the side post assemblies in between and screw the side assemblies to the side posts according to the manufacturer's instructions.
Attach the two sides together with the top and bottom end beams on the foot side of the bed and just the bottom end beam on the head. Put the bars in the holes in the bottom head end beam. Install the top end beam (again, lots of fiddling to get all those bars lined up) and screw it to the corner posts.
Install the center beams, center posts and bed slats according to the manufacturer's instructions.
Tighten all the screws fully once the assembly is complete.
Doors
The frames of the doors are made of extra bedslats from the second frame.
For each door:
- Cut two 27" and two 14" pieces from the leftover bed slats. The 14" pieces will butt up against the inside of the corner pieces, while the 27" pieces will sit pressed against the walls of the 14" pieces, so that the door is a bit over 14" tall but over 28" wide
- Drill 2 pairs of holes opposite each other on each end of each bar (total of 32 holes). These are the holes that the corner clamp bolts will go through. Remember that the holes on the 14" pieces need to be further from the ends than the holes on the 27" pieces. Do a test assembly first to mark out where the holes need to go
- Drill 6 holes in the two 27" pieces for the bars to fit into
- Assemble the door
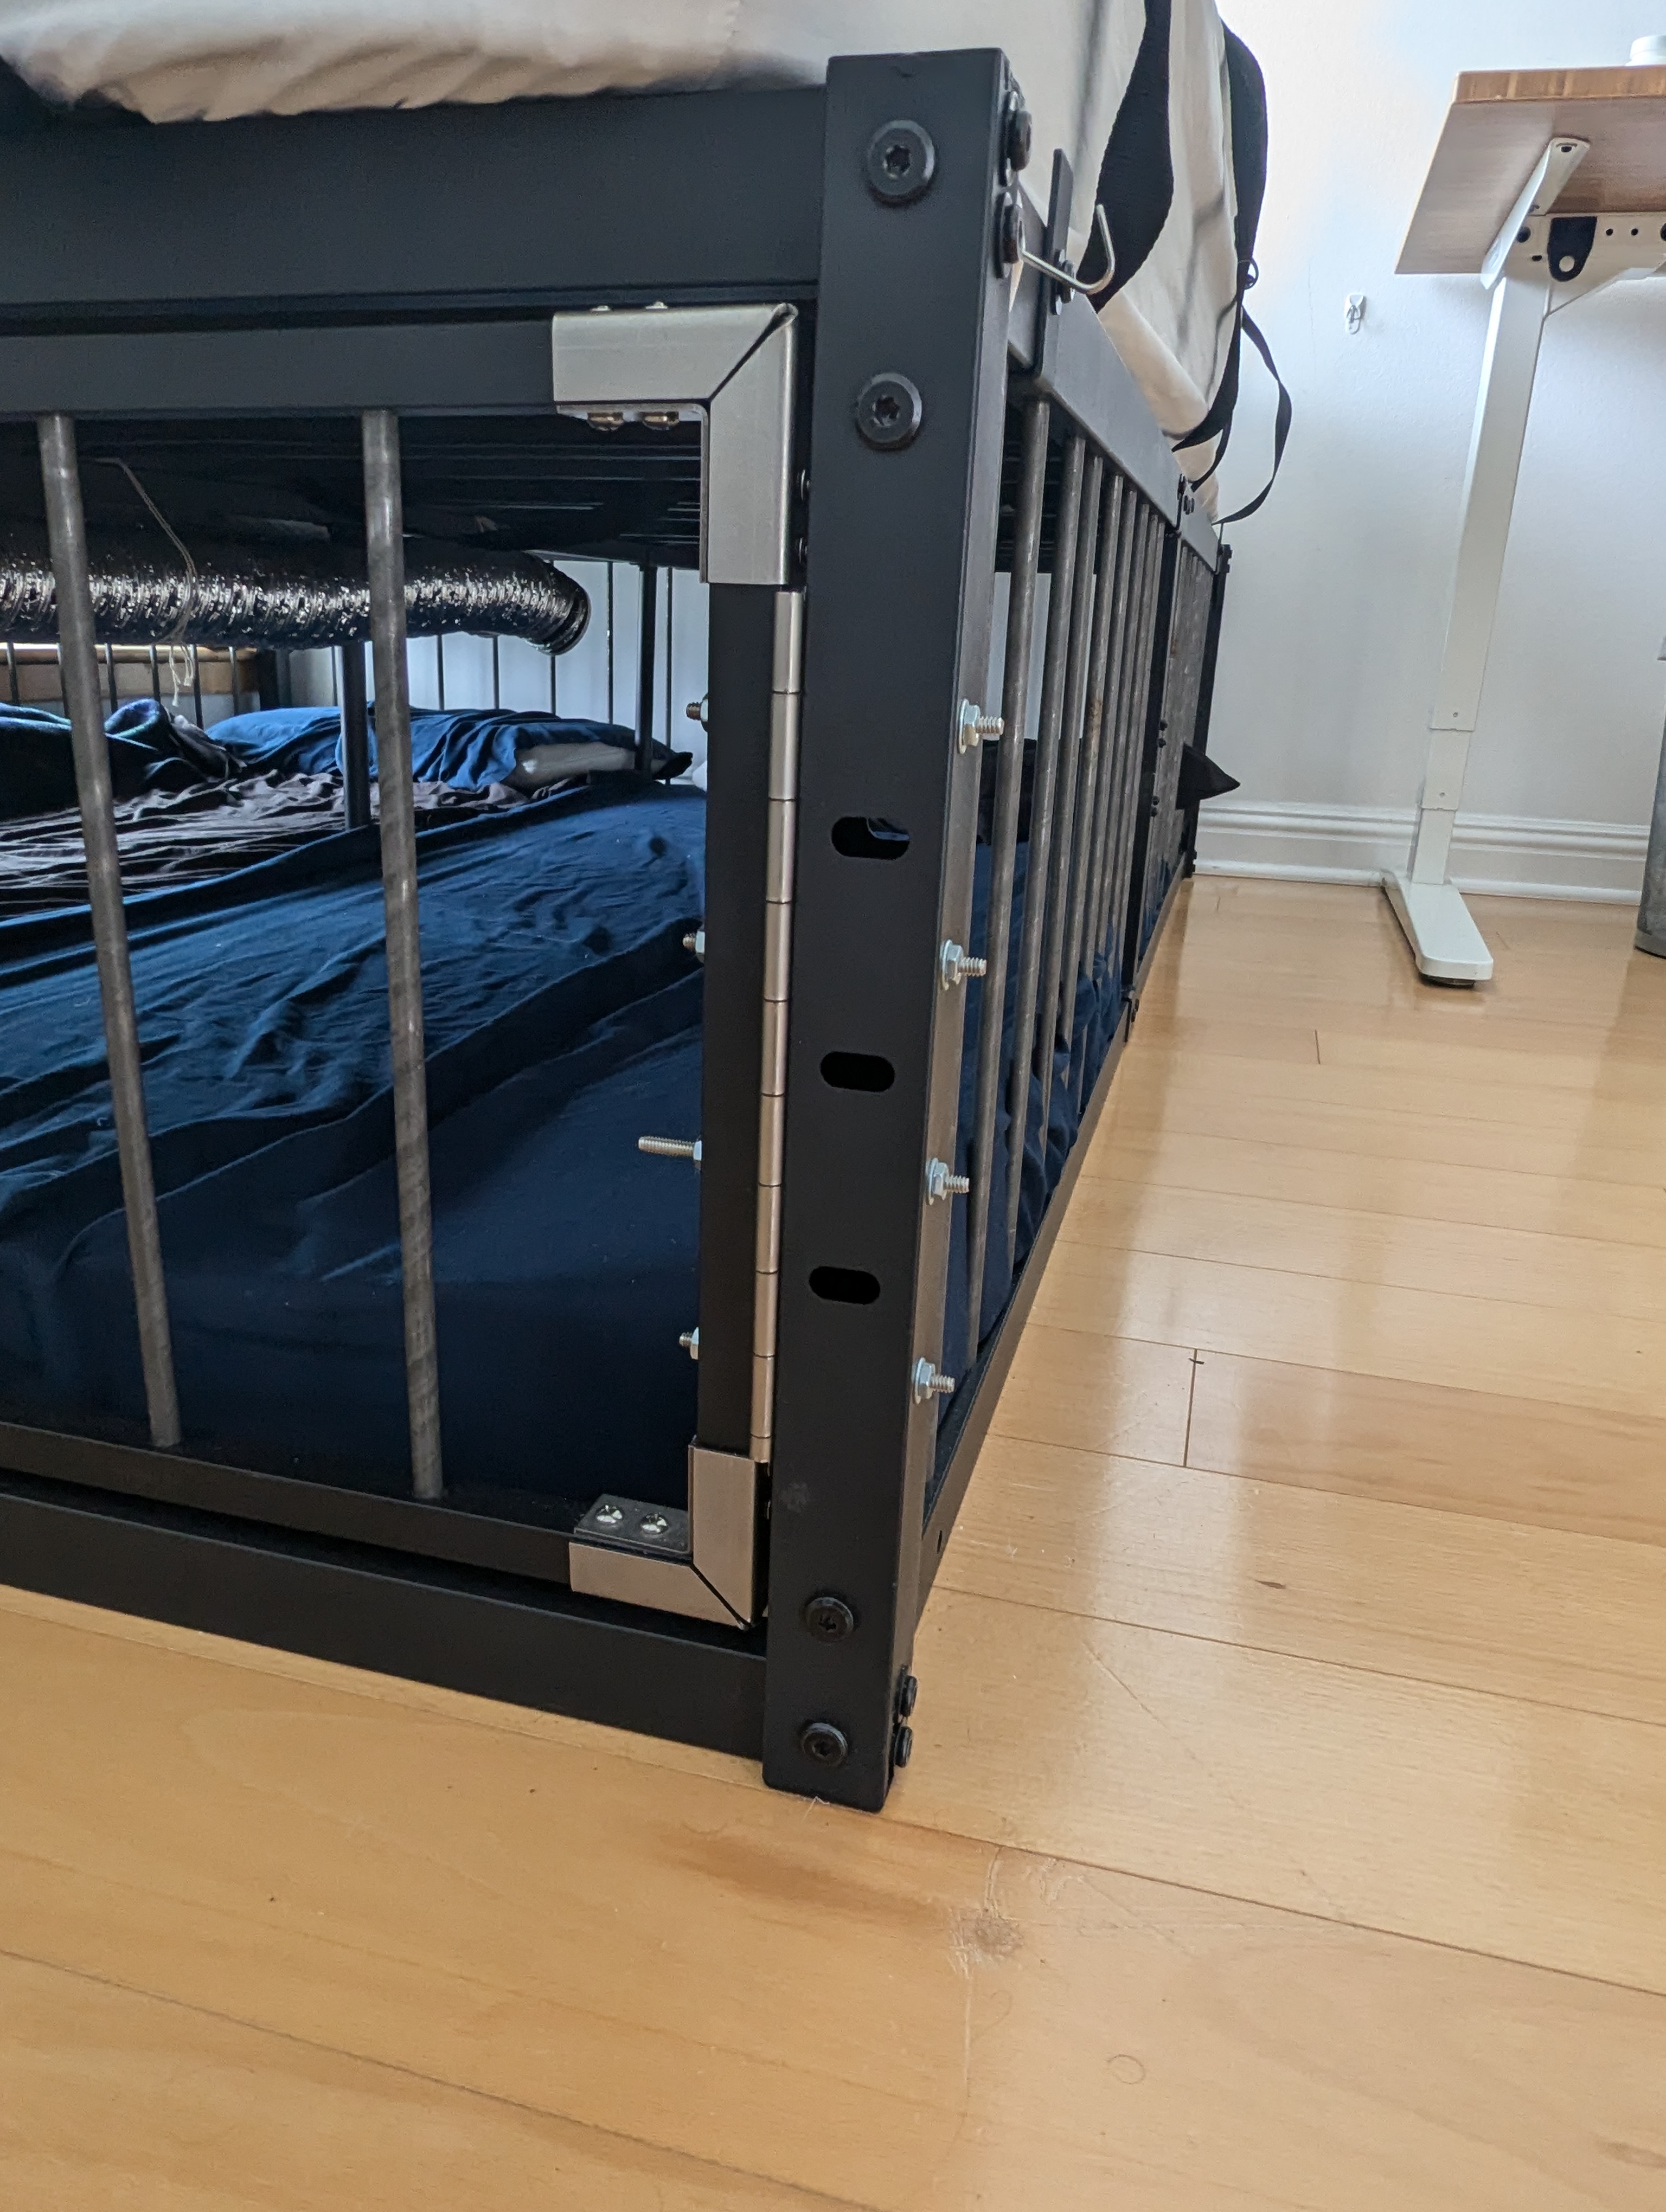
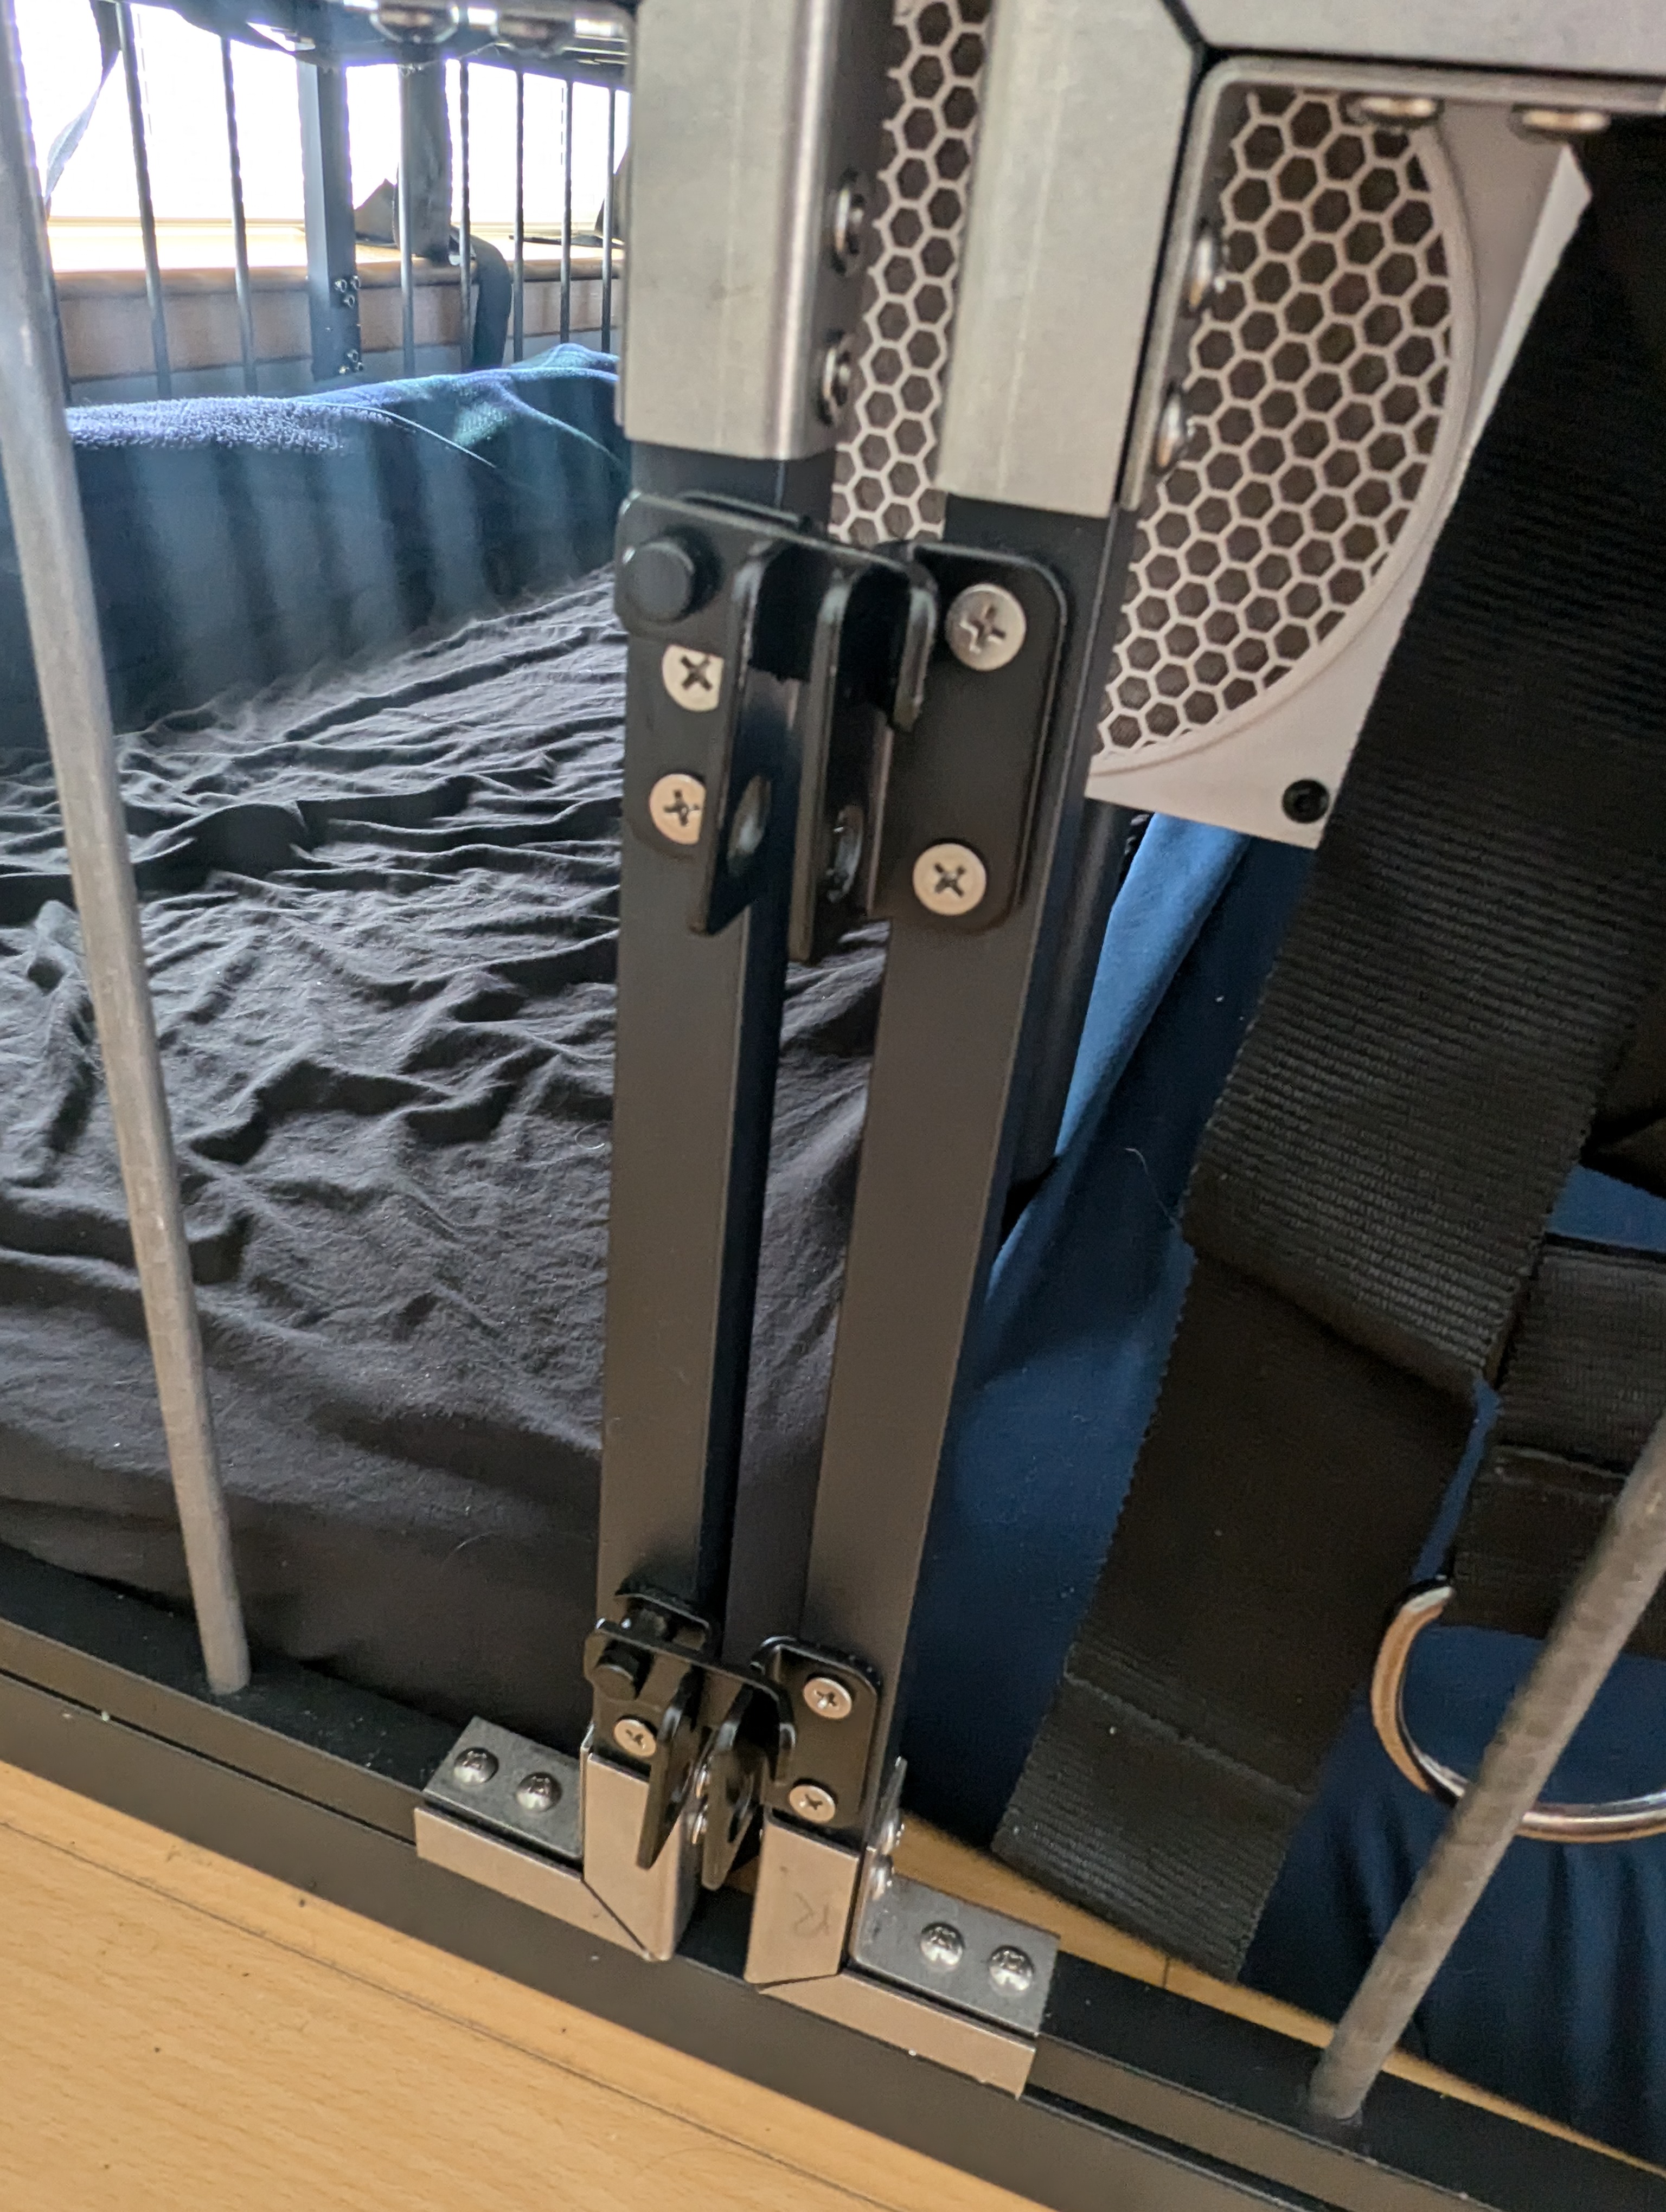
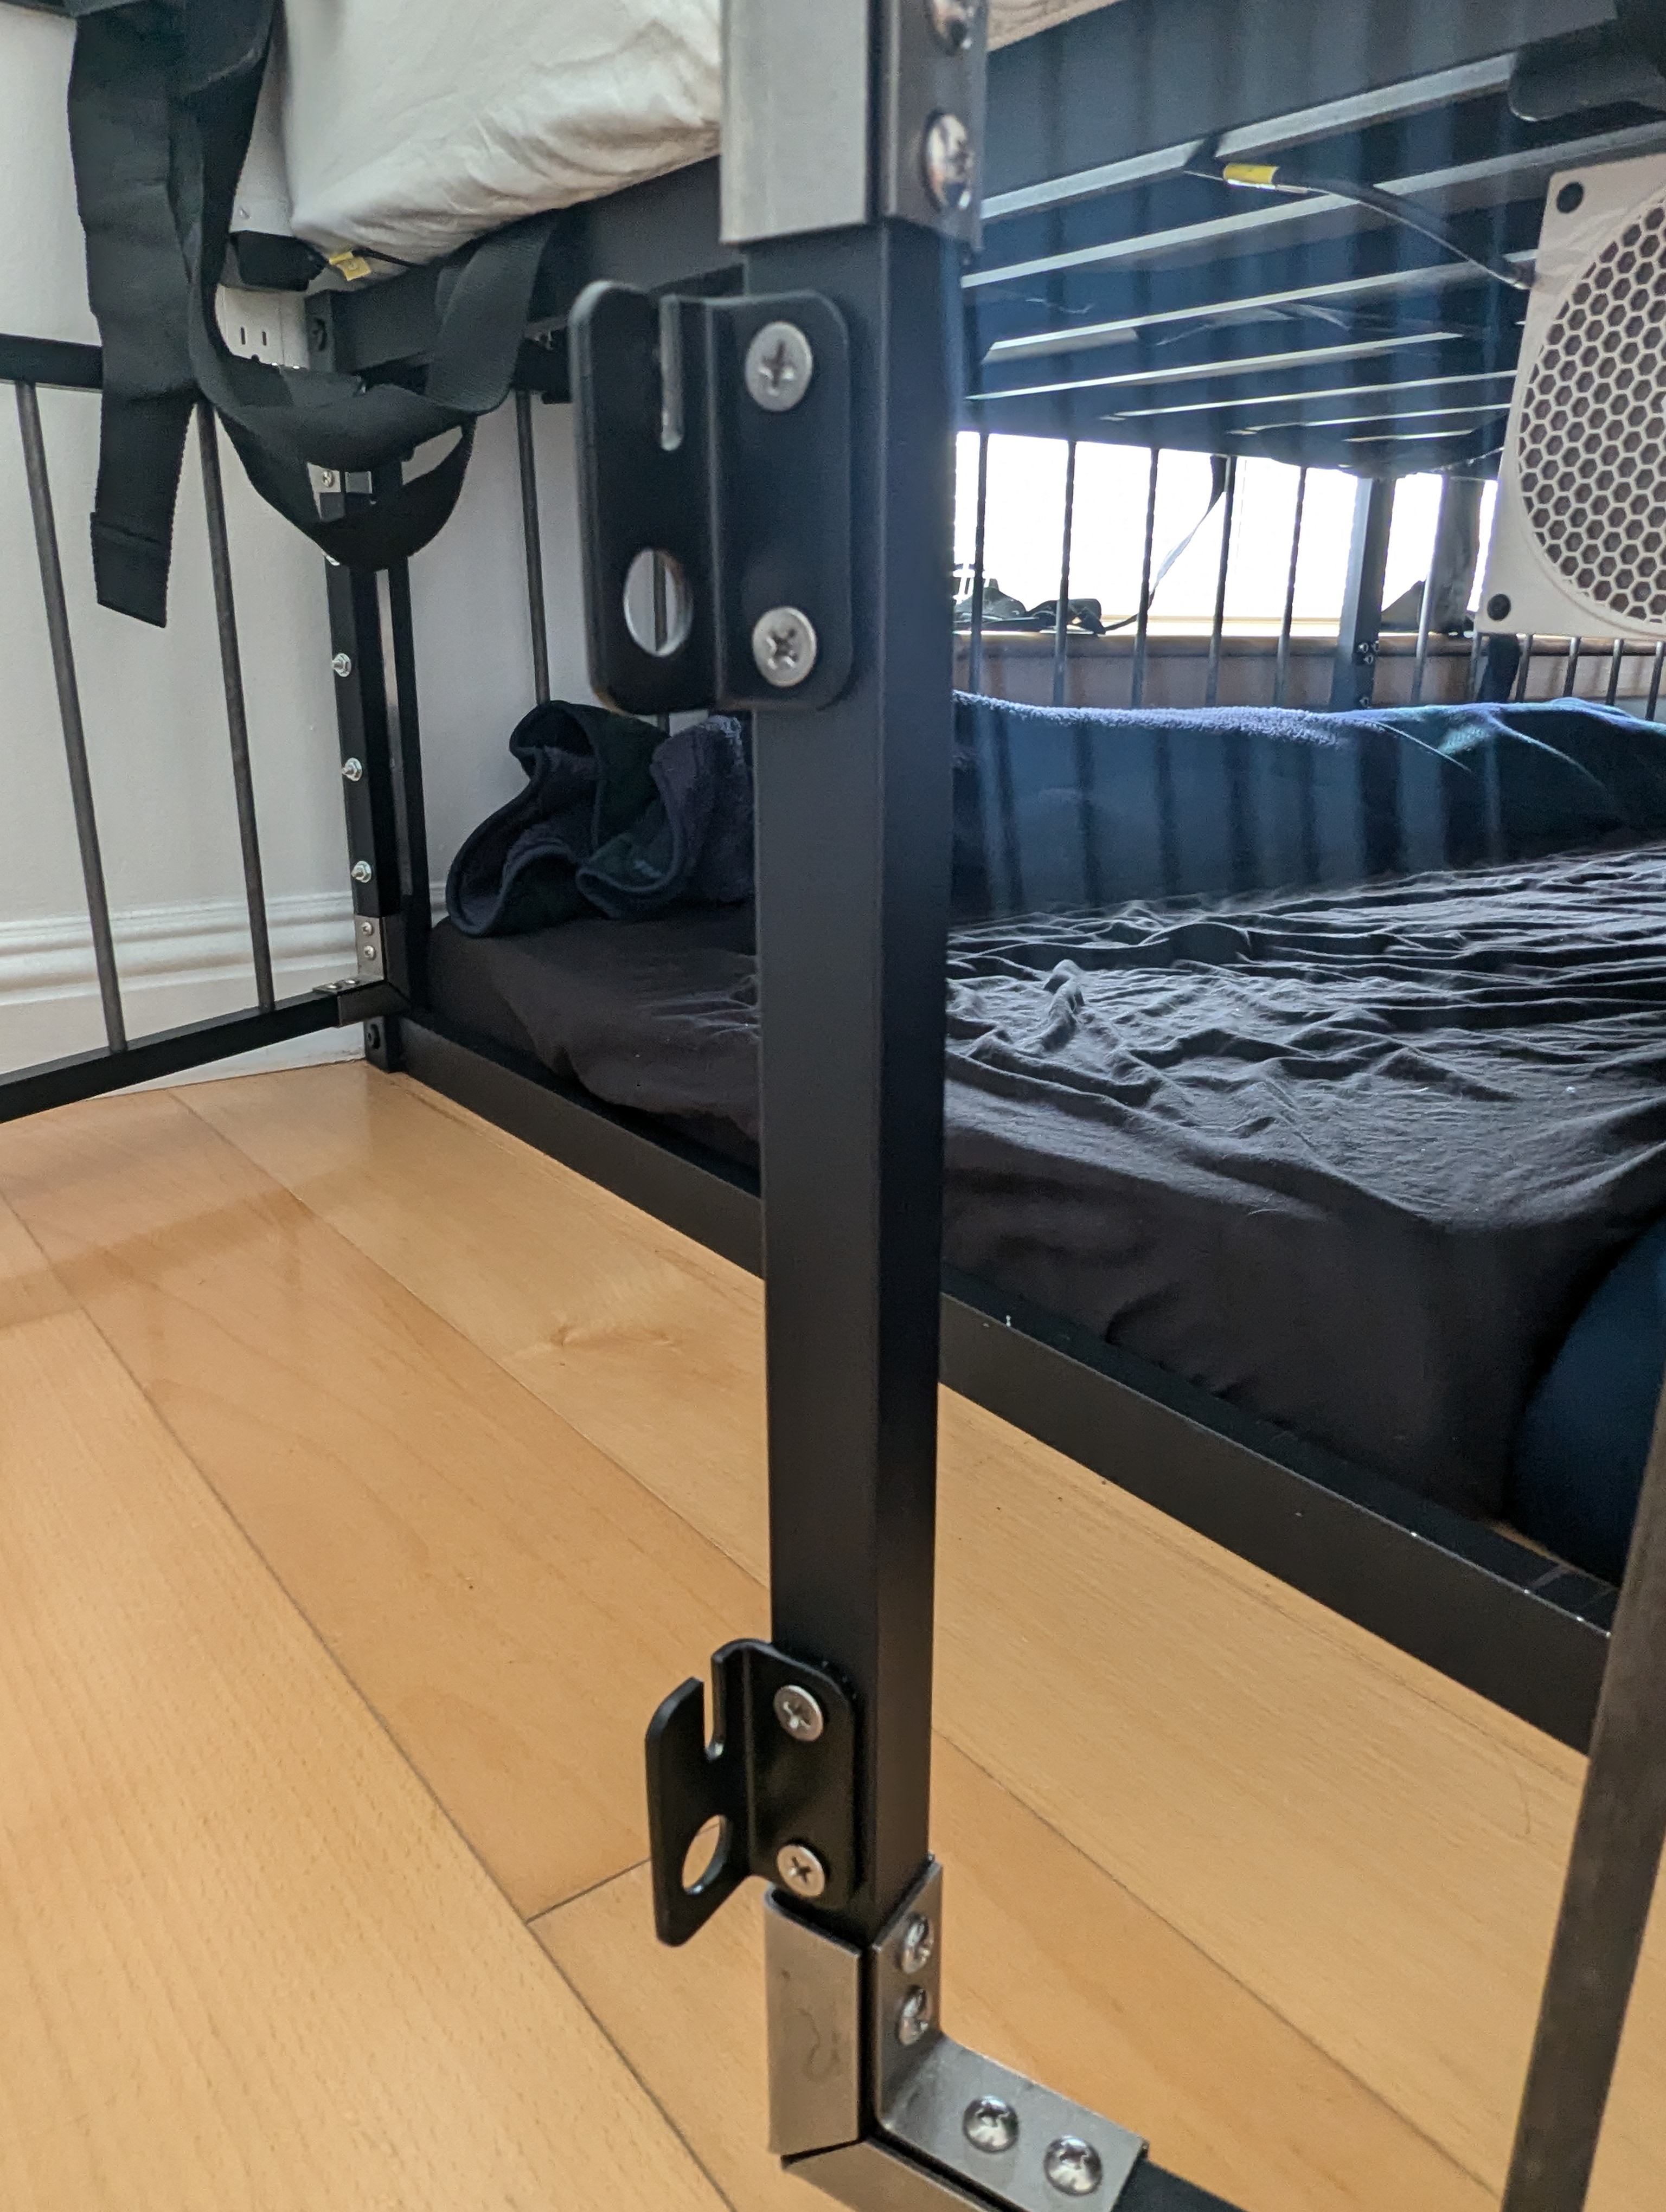
To mount the doors on the corner posts, first cut the hinges down to size (you can do the bulk of this on the bandsaw but in my experience the hinge itself was too thick and had to be cut with an angle grinder). Then drill 4 pairs of holes through the sides of the doors and through the corner posts (measure first! I leave the details as an exercise for the reader).
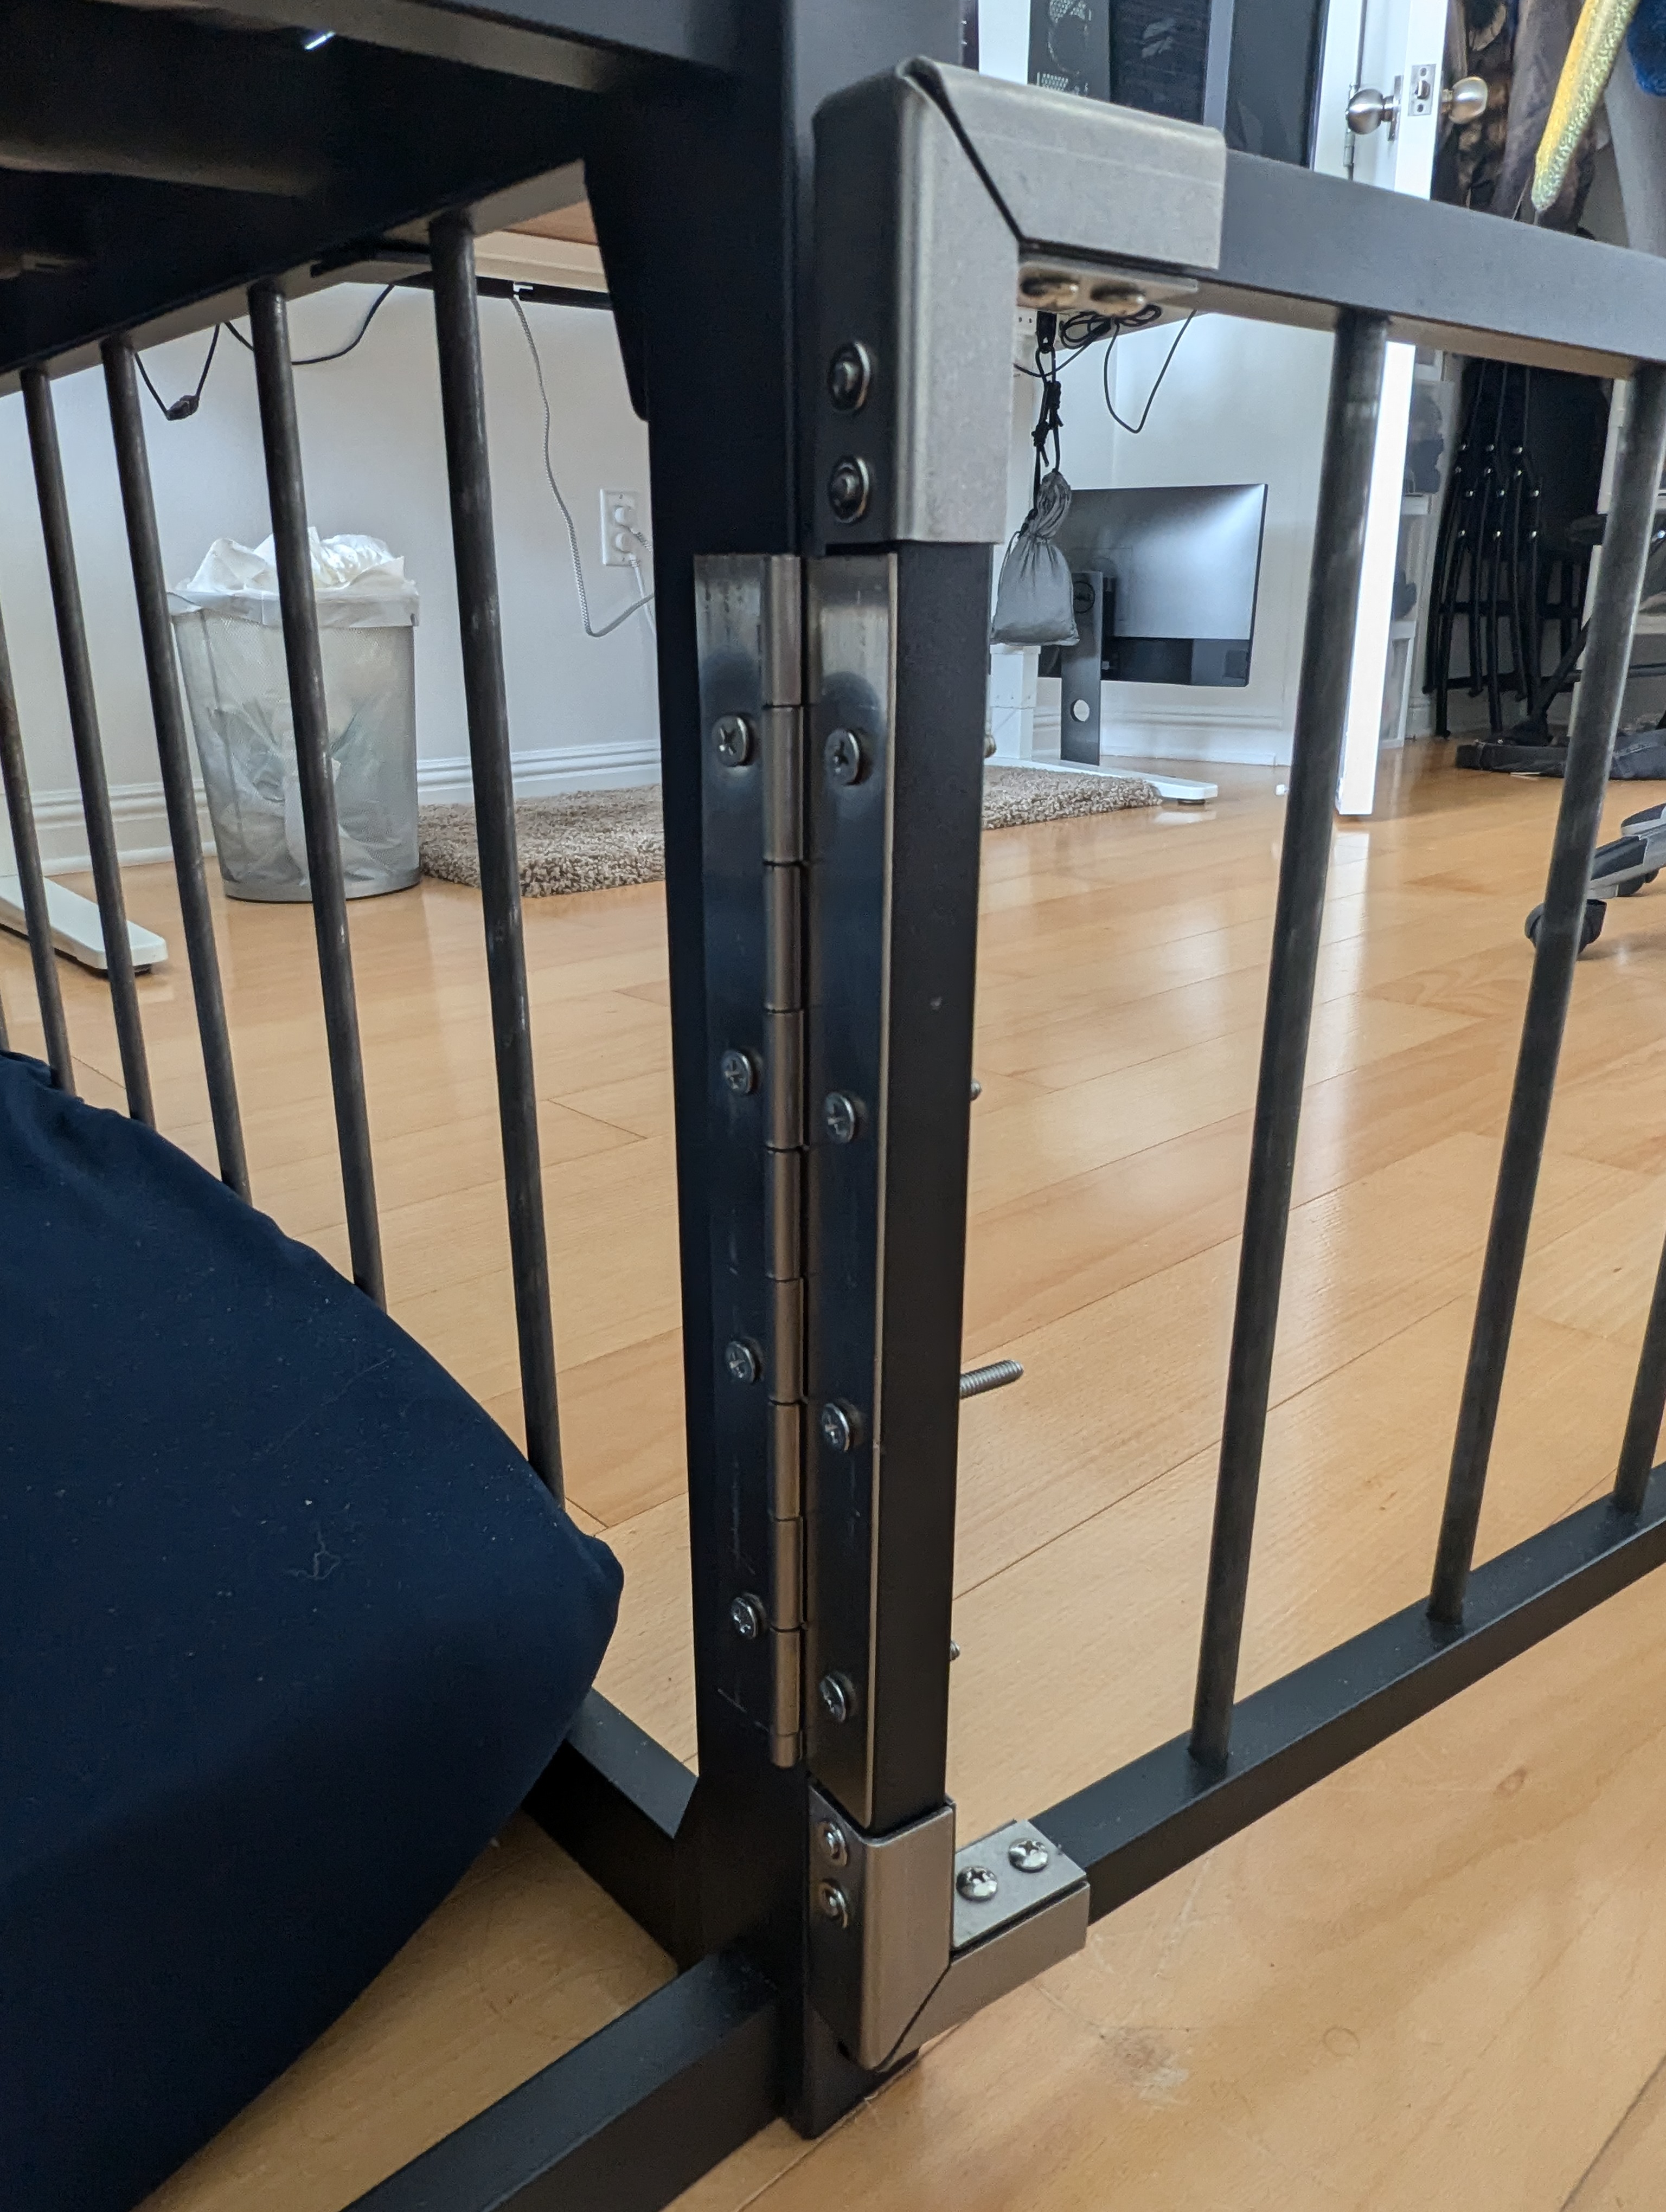
The hinges attach to the doors and the corner posts with nuts and bolts (make sure you get countersunk bolts so they sit in the wells of the hinge!).
Drill some more holes in the doors and mount the latches. These are how you'll lock the cage.
Ventillation
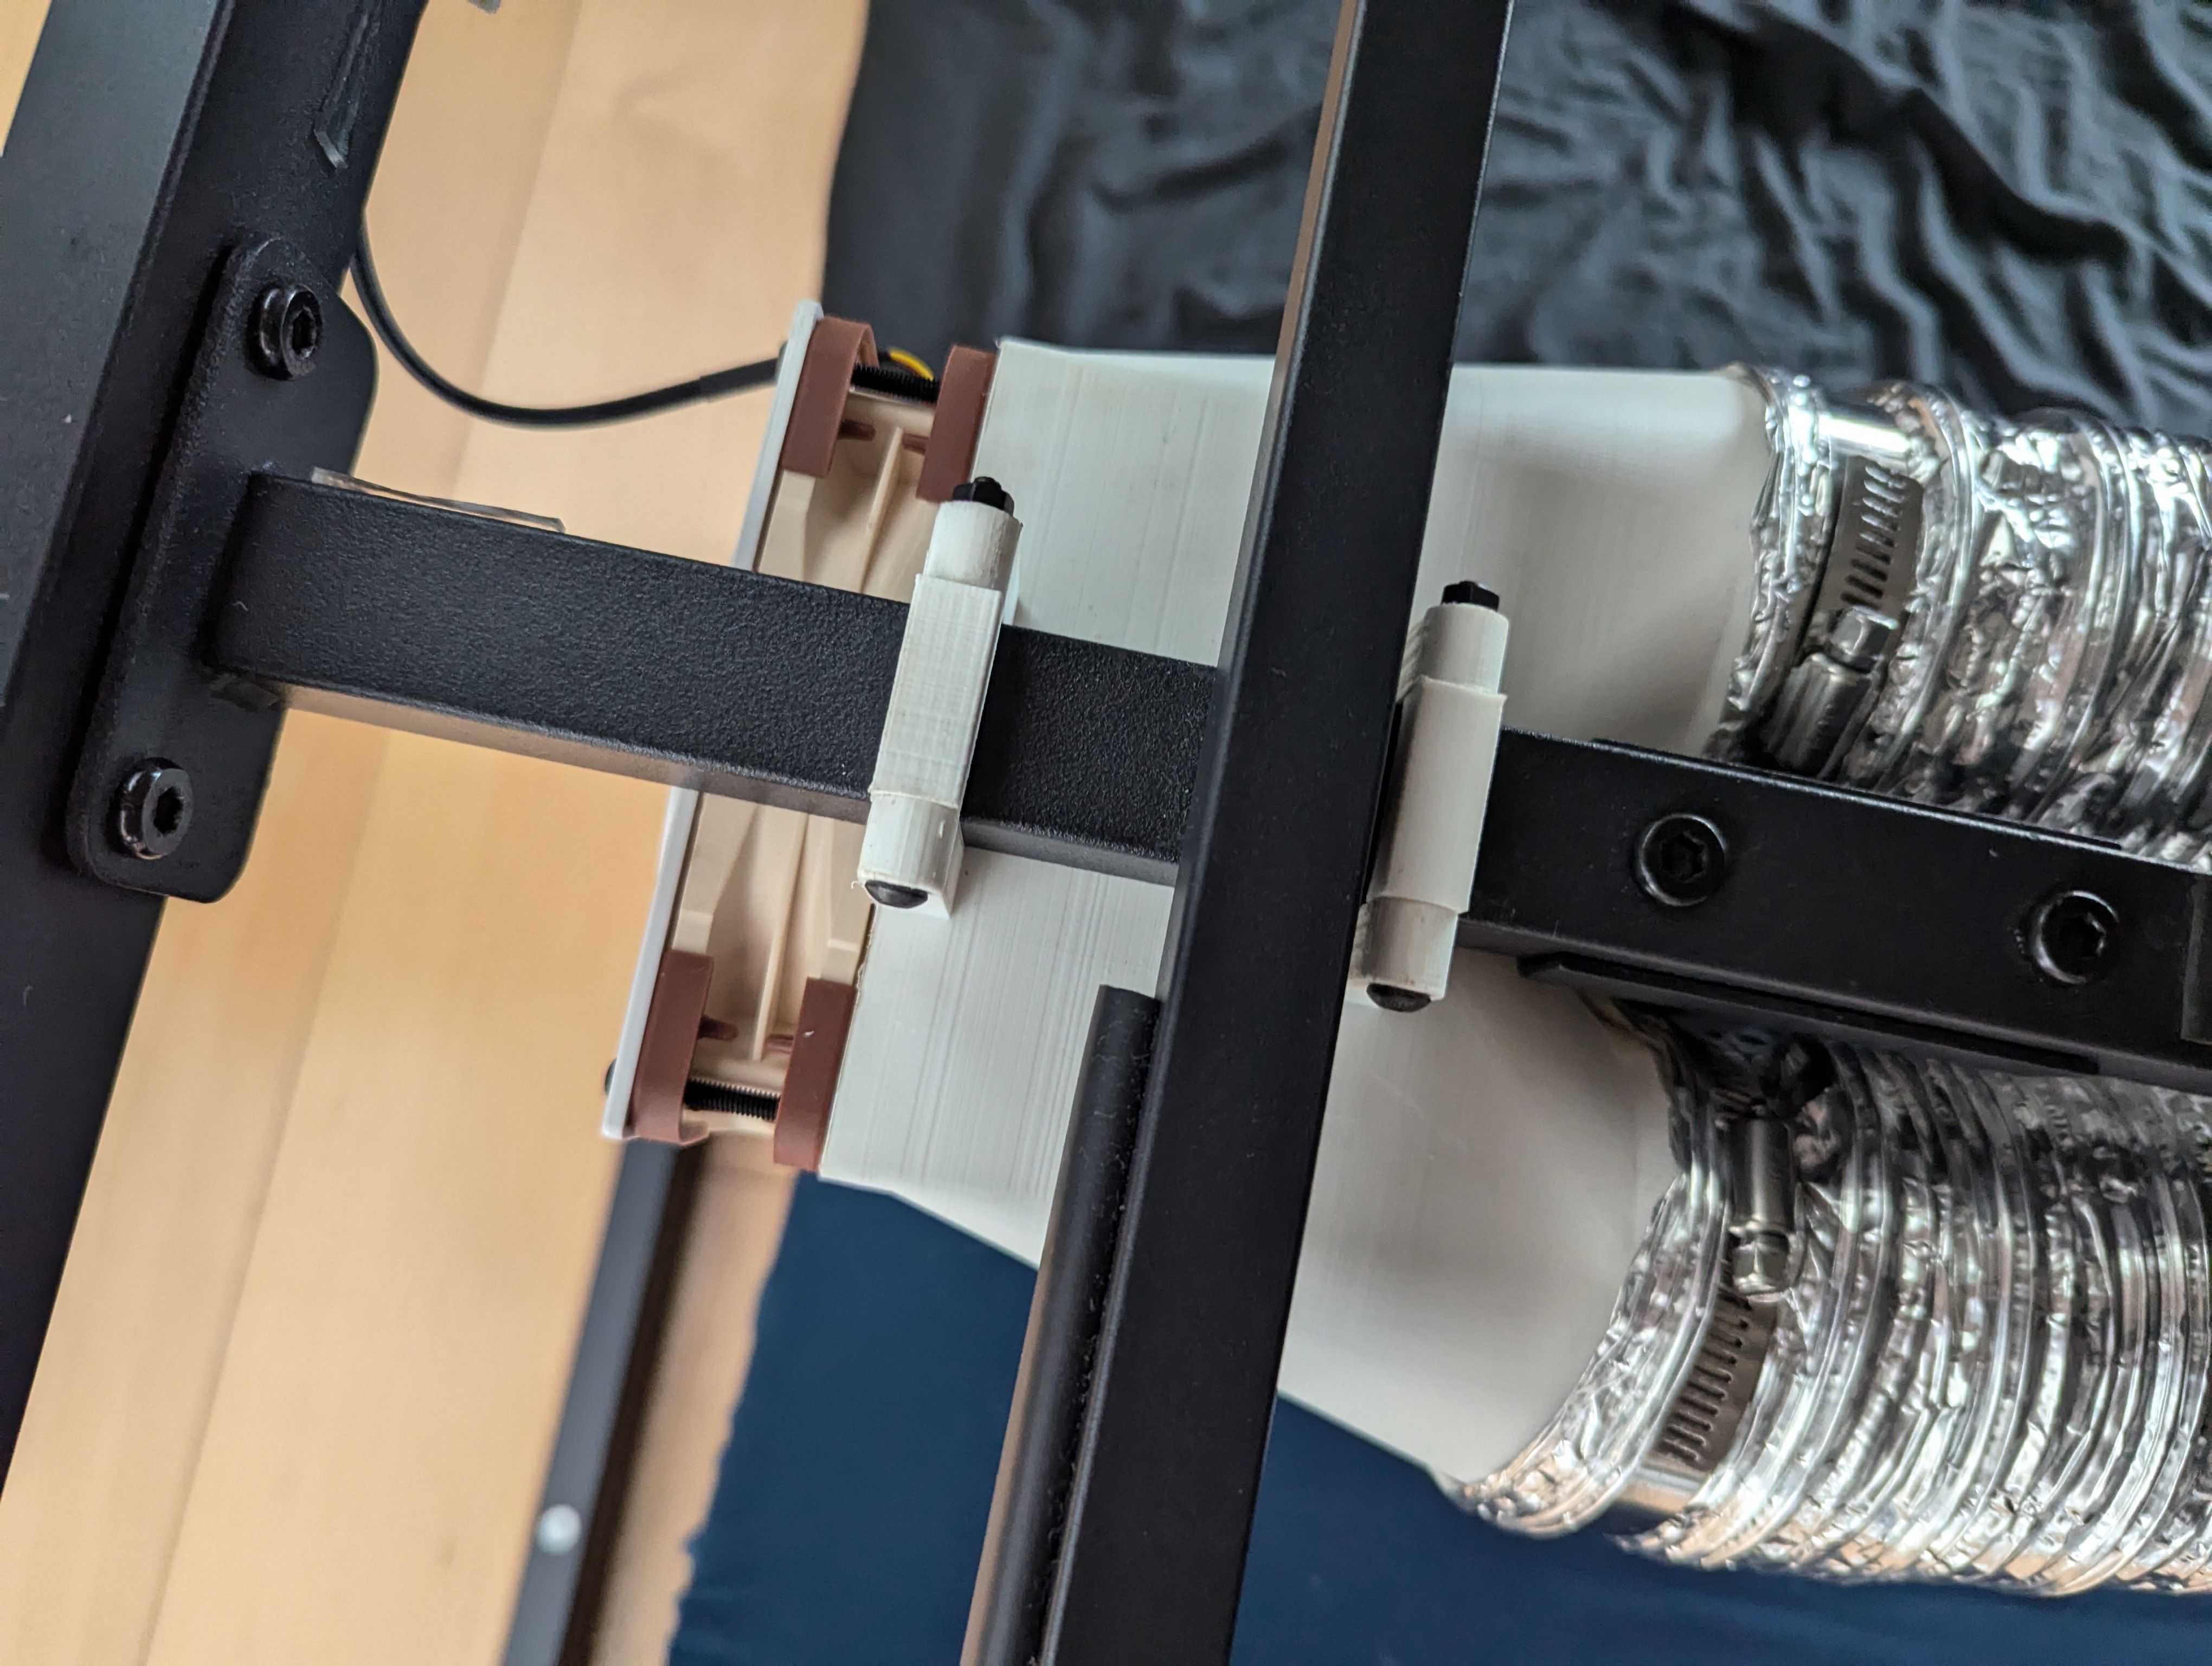
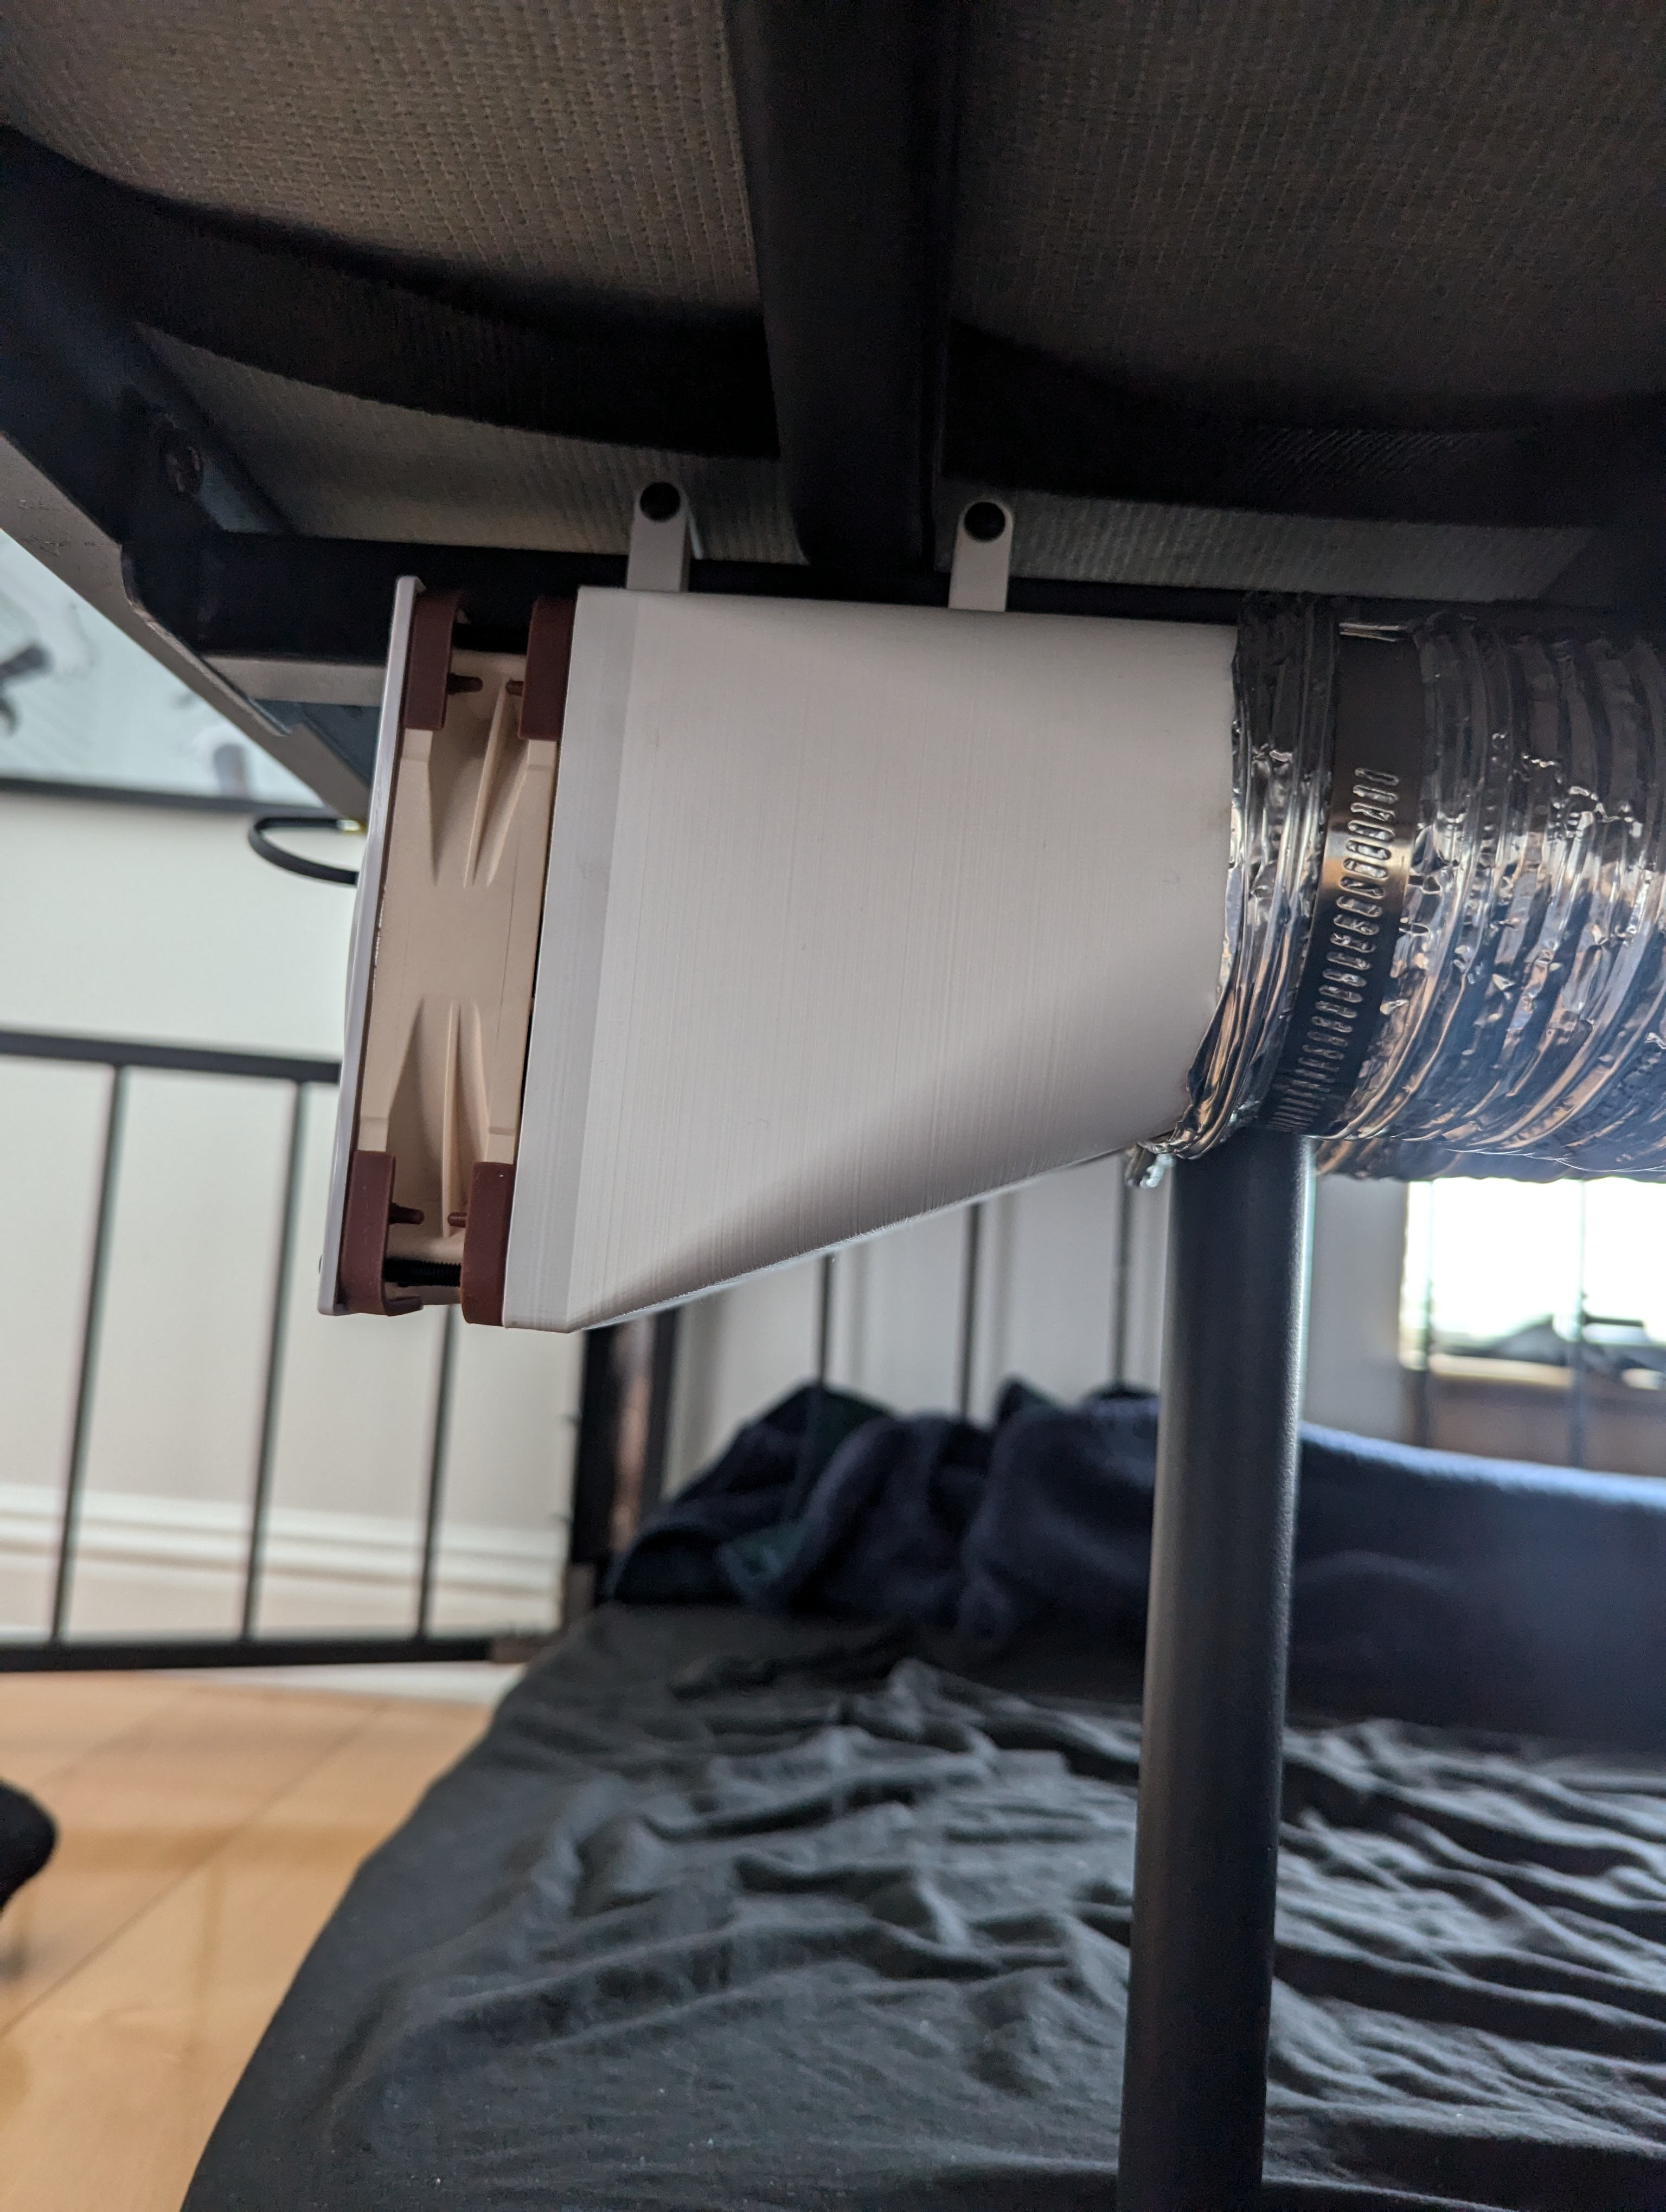
The ventillation system consists of a computer case fan (with a grill to protect the fan from dust and your fingers from the fan) attached to a 3d printed splitter which splits the air into two lengths of 3" ducting that run the length of the cage. The ends are capped with another set of 3d printed parts. Air comes out through a bunch of holes in the ducts.
I used a 5v fan so I could plug it directly into a USB power supply. If the door of your cage isn't near an outlet, you might need some USB extension cables, or you might want to use a 12v fan and run some wire.
Print the splitter, 4 nut retainers, 2 square bars and 2 end caps (these were all made in OpenScad. If you want to make modifications to them, the scad files are here). The nut holders are little pieces that hold a nut and go inside the splitter, on the side where the fan is attached. They're there to give the bolts something to screw in to. The square bars go on top of the center beams. They're just there so that the bolts aren't resting directly on the center beams, and so you can tighten the bolts without worrying about breaking the splitter.
Put an M4 nut in each of the nut holders and glue the nut holder into the inside of the duct, so that when you put the screws through the holes in the splitter to mount the fan, they'll go through the nuts too. Make sure you don't get any glue inside the nut! I only put glue on the outside edge of the holder and that's been strong enough.
Place the fan on the splitter so that it's pushing air into the splitter. Place the grill on the other side of the fan and screw the whole thing together with 4 45mm M4 bolts.
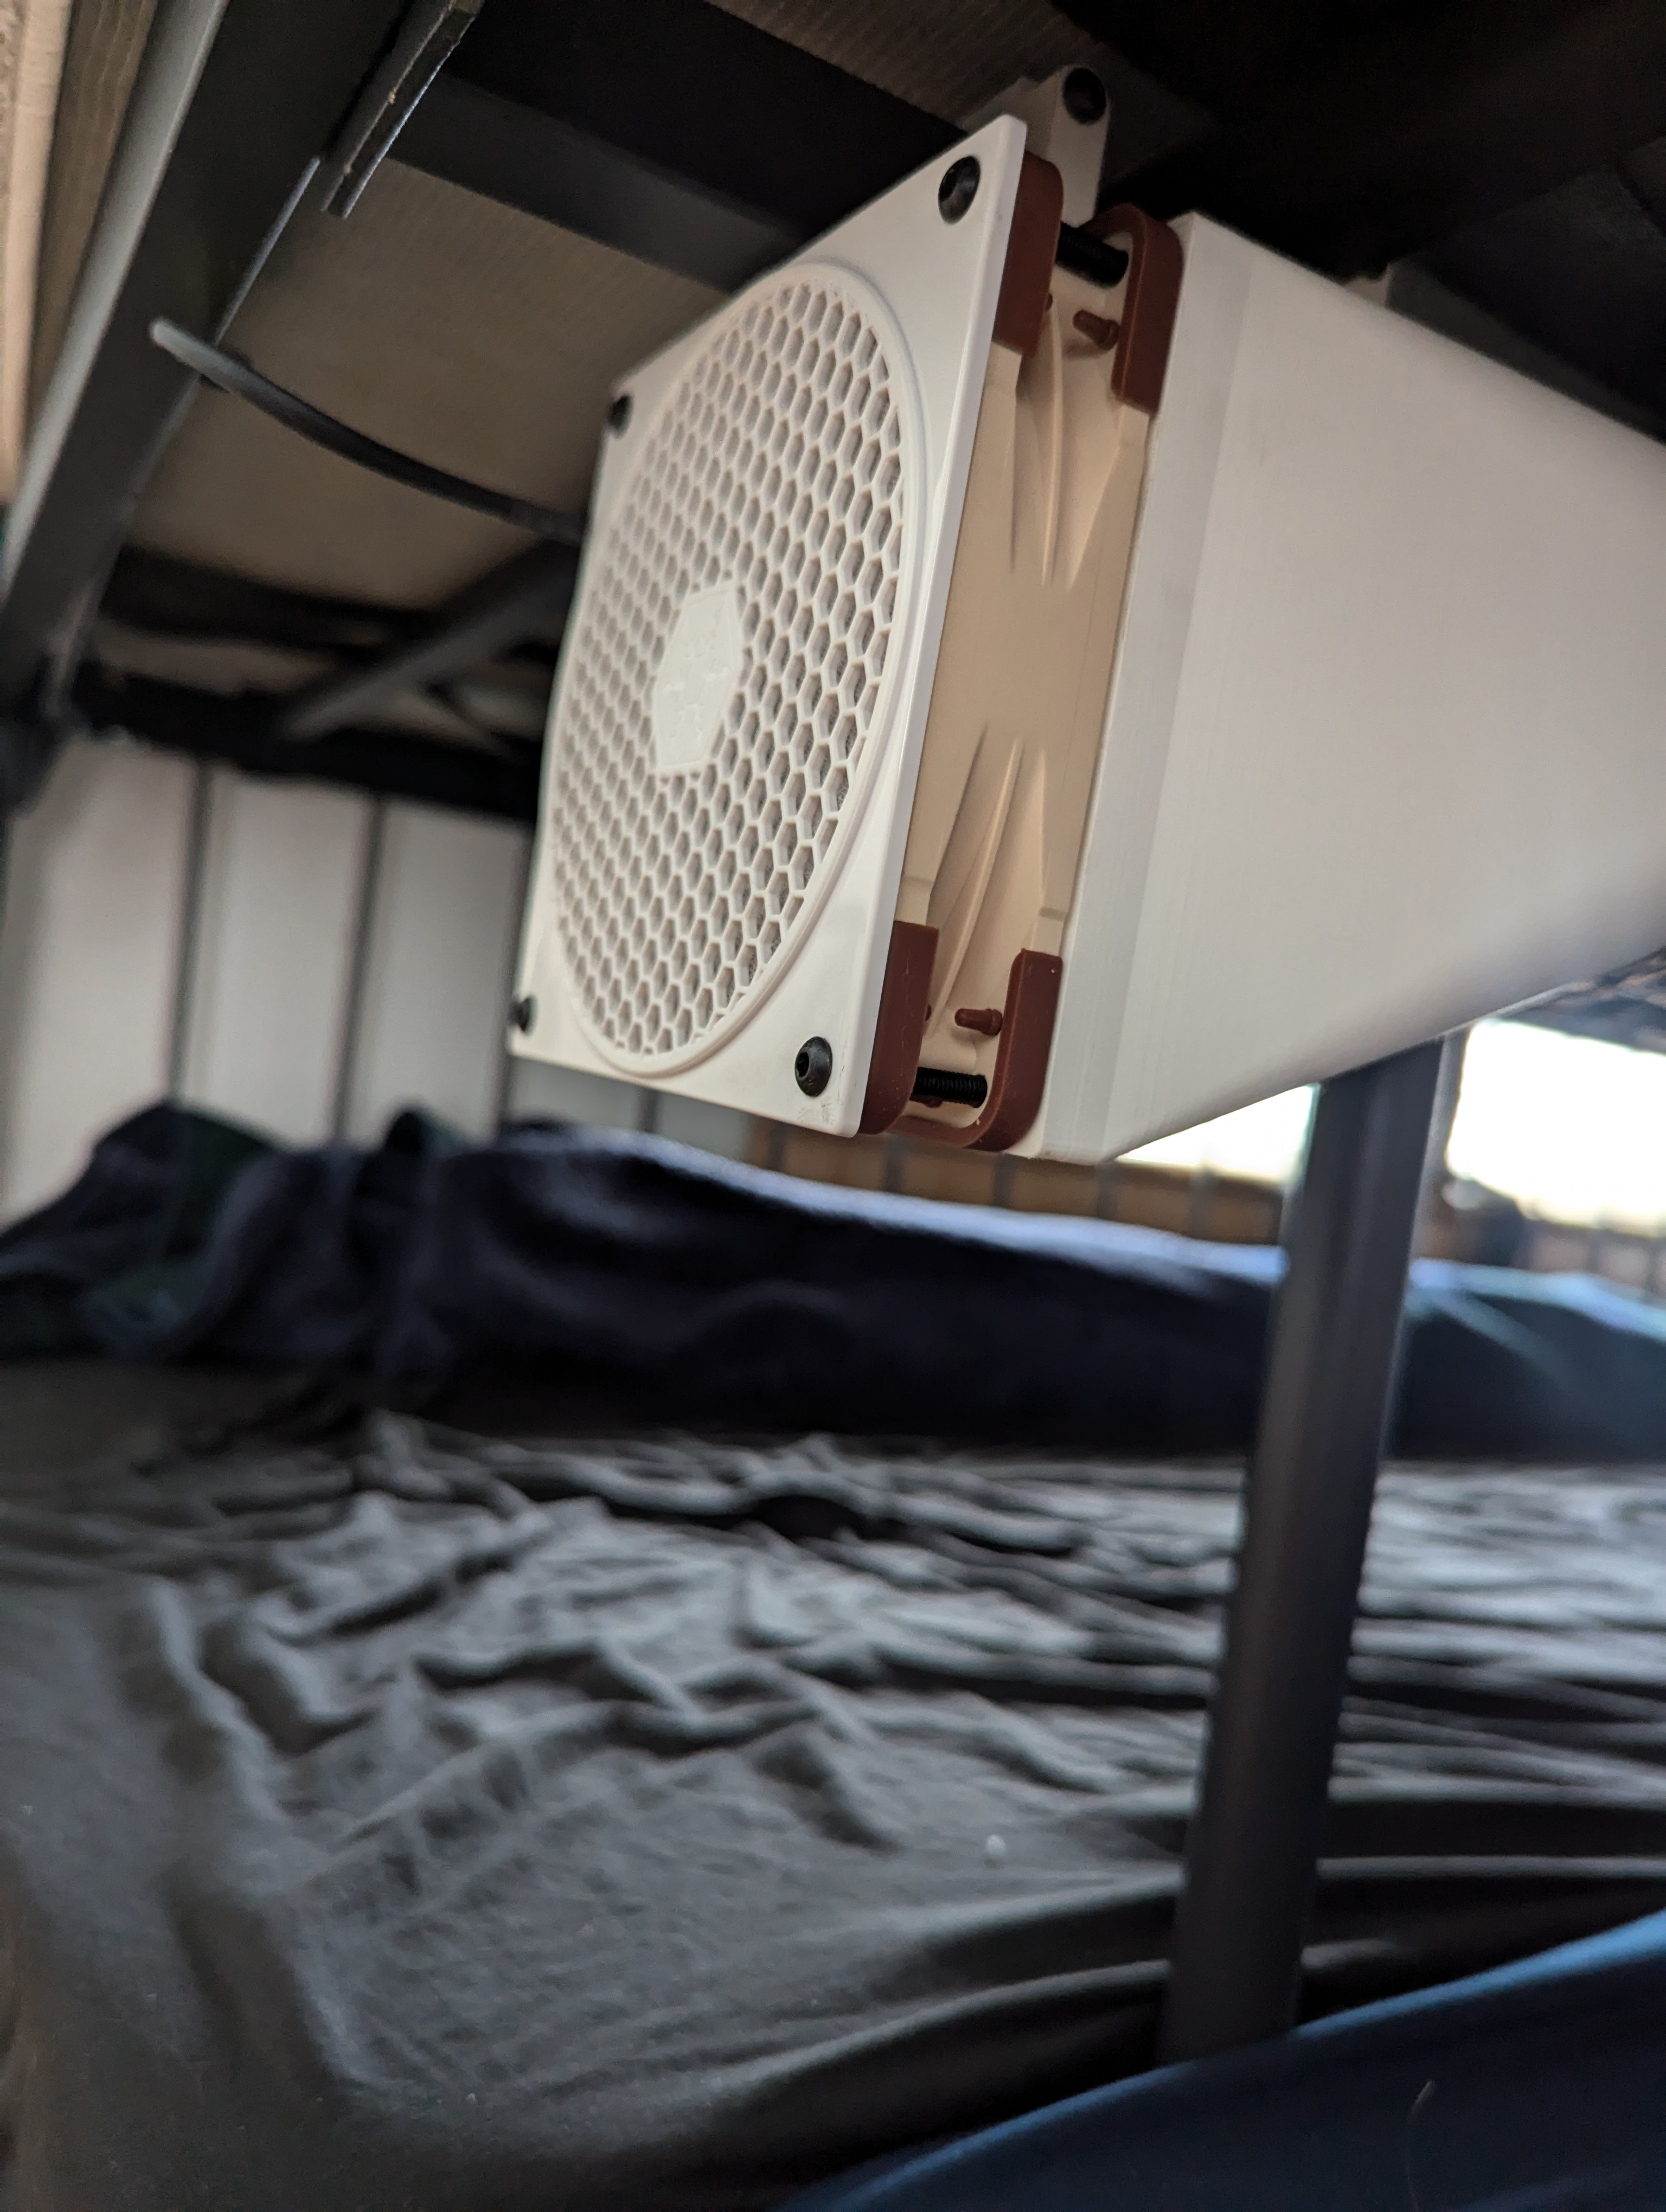
Put the splitter into position, with each pair of attachment points straddling the center beam, one pair in front of the first bed slat and the other pair behind it. For each pair of attachment points, place a square bar between the two points, and stick a 50mm M4 bolt through one attachment point, the square bar, the other attachment point, and a nut on the other side.
Extend the duct to its full length and cut it into 2 pieces (approx. 4 feet each).
For each length of ducting:
- Place one end over one of the round holes on the splitter
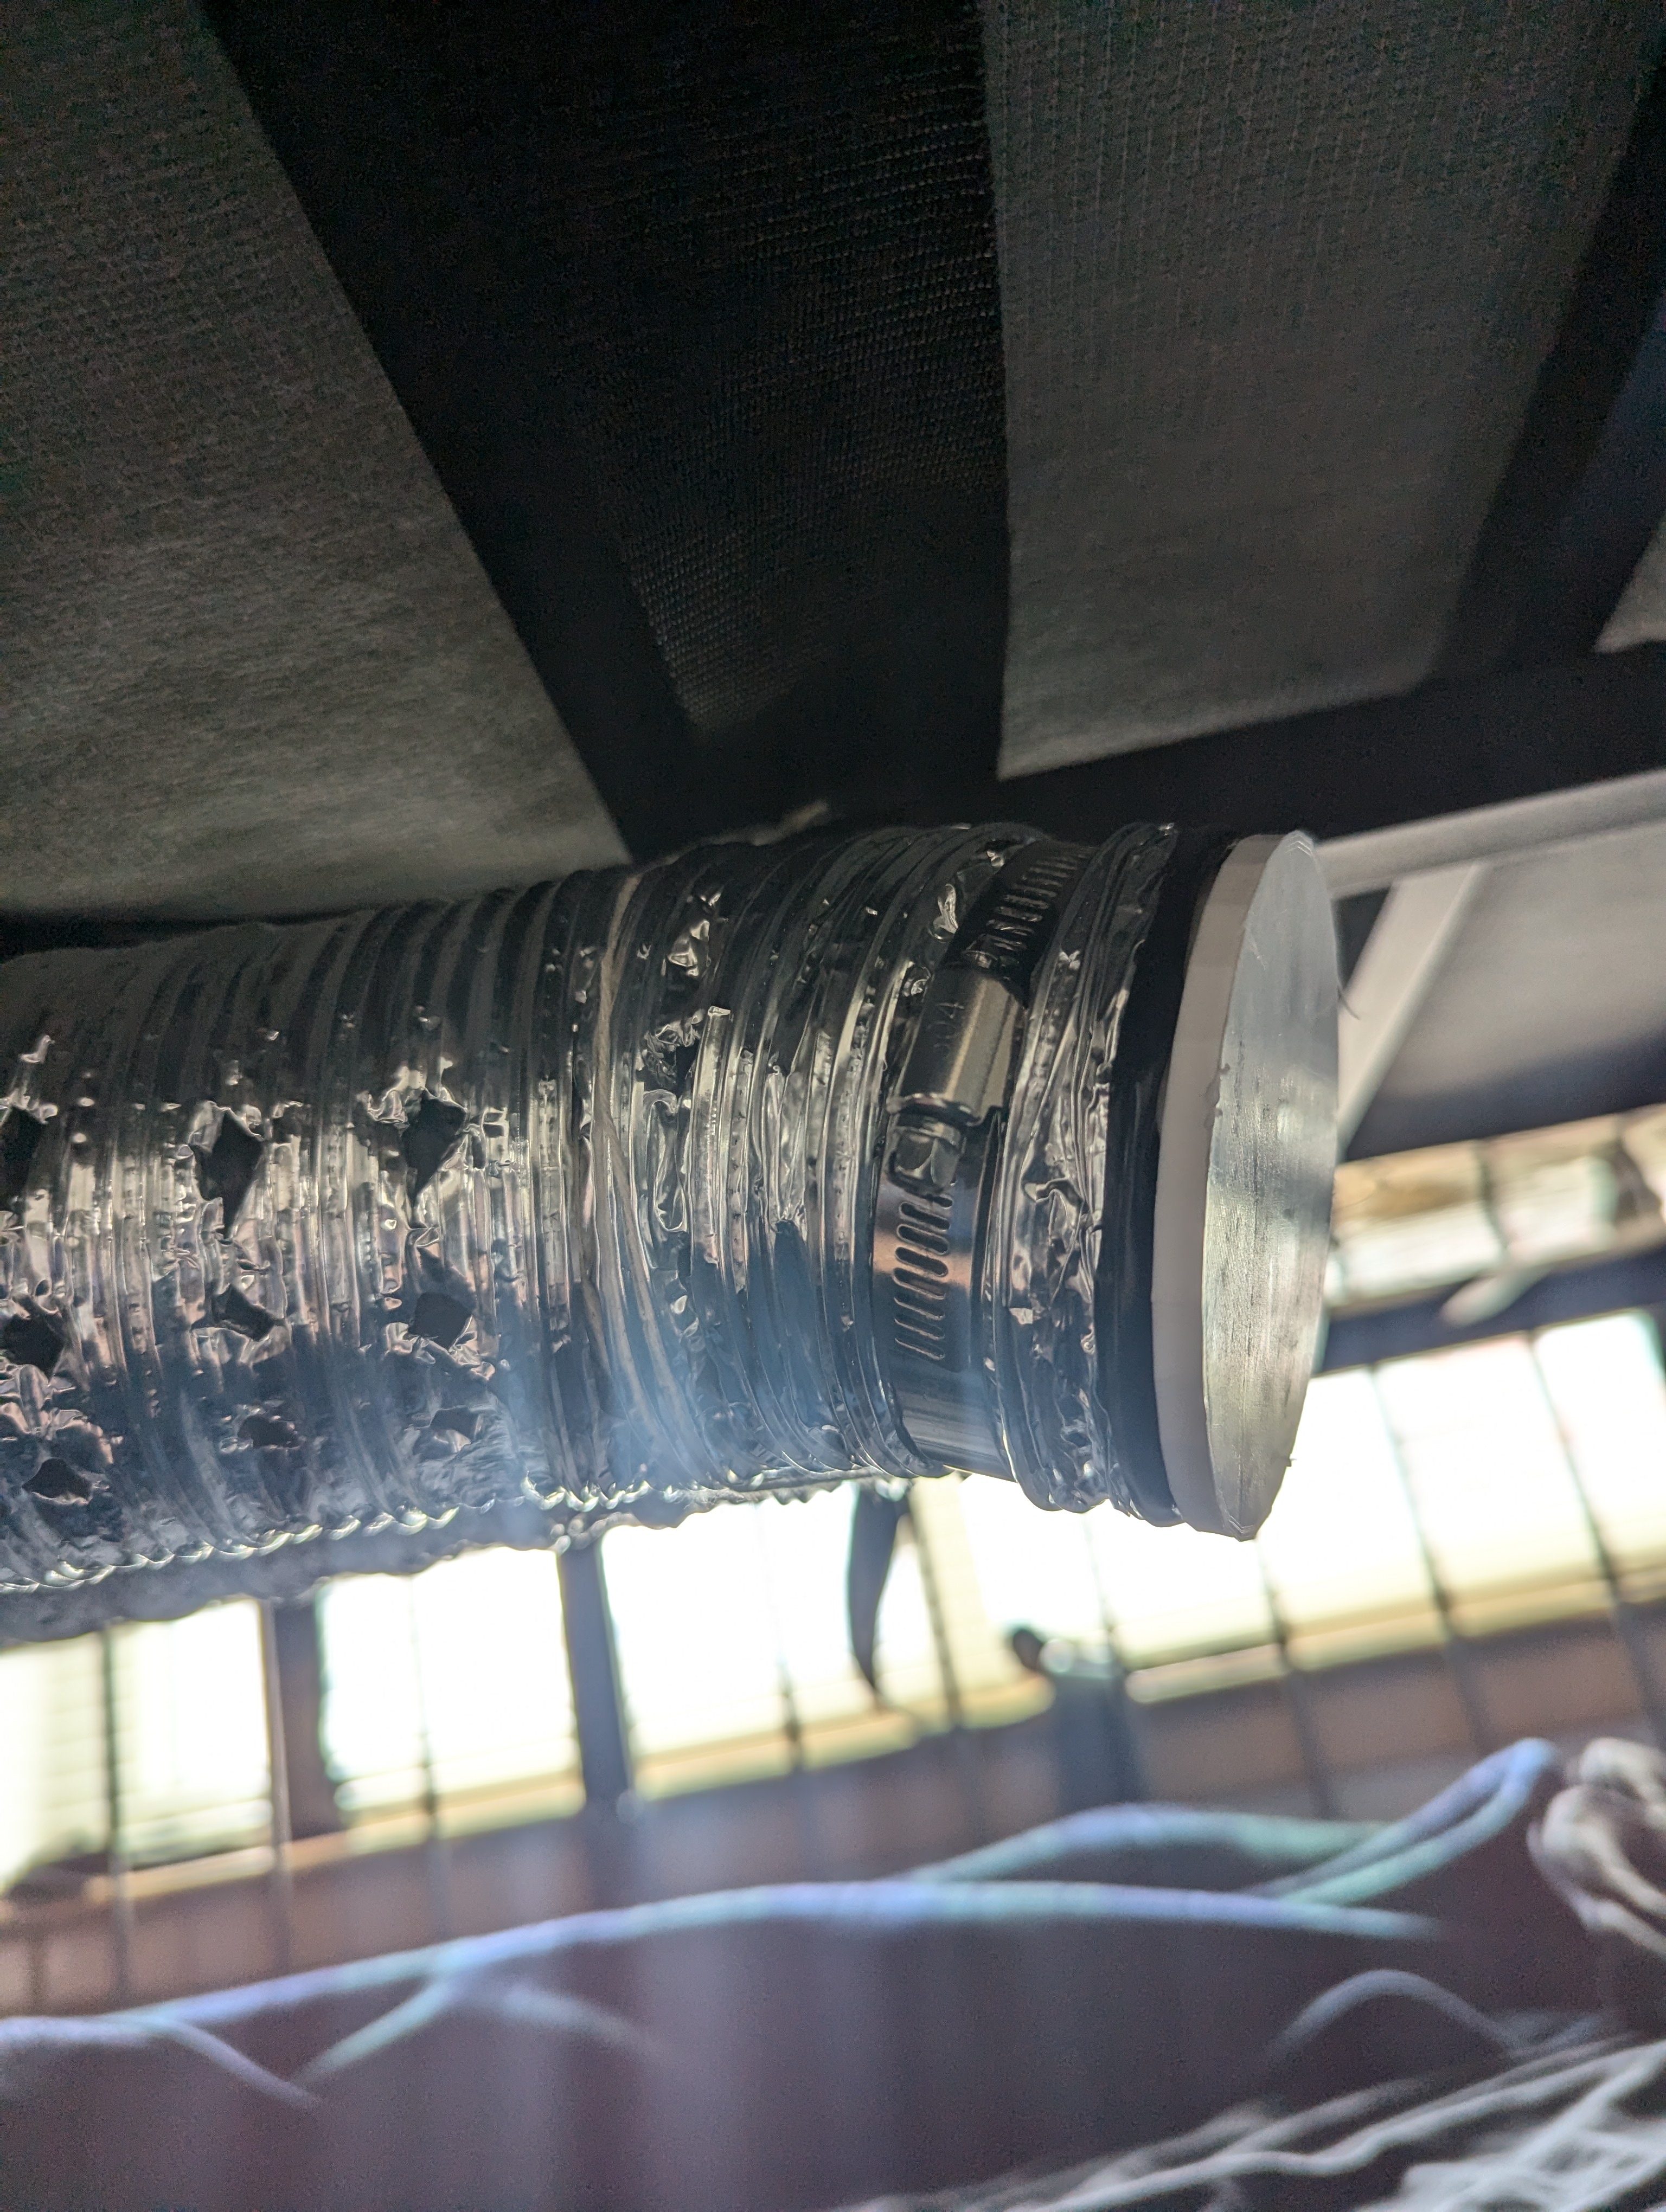
- Attach the ducting to the splitter with a duct clamp (you can either put the clamp loosely on the splitter before putting the duct on, or, once the duct is on, you can fully loosen the duct clamp so it comes apart then wrap it around the duct).
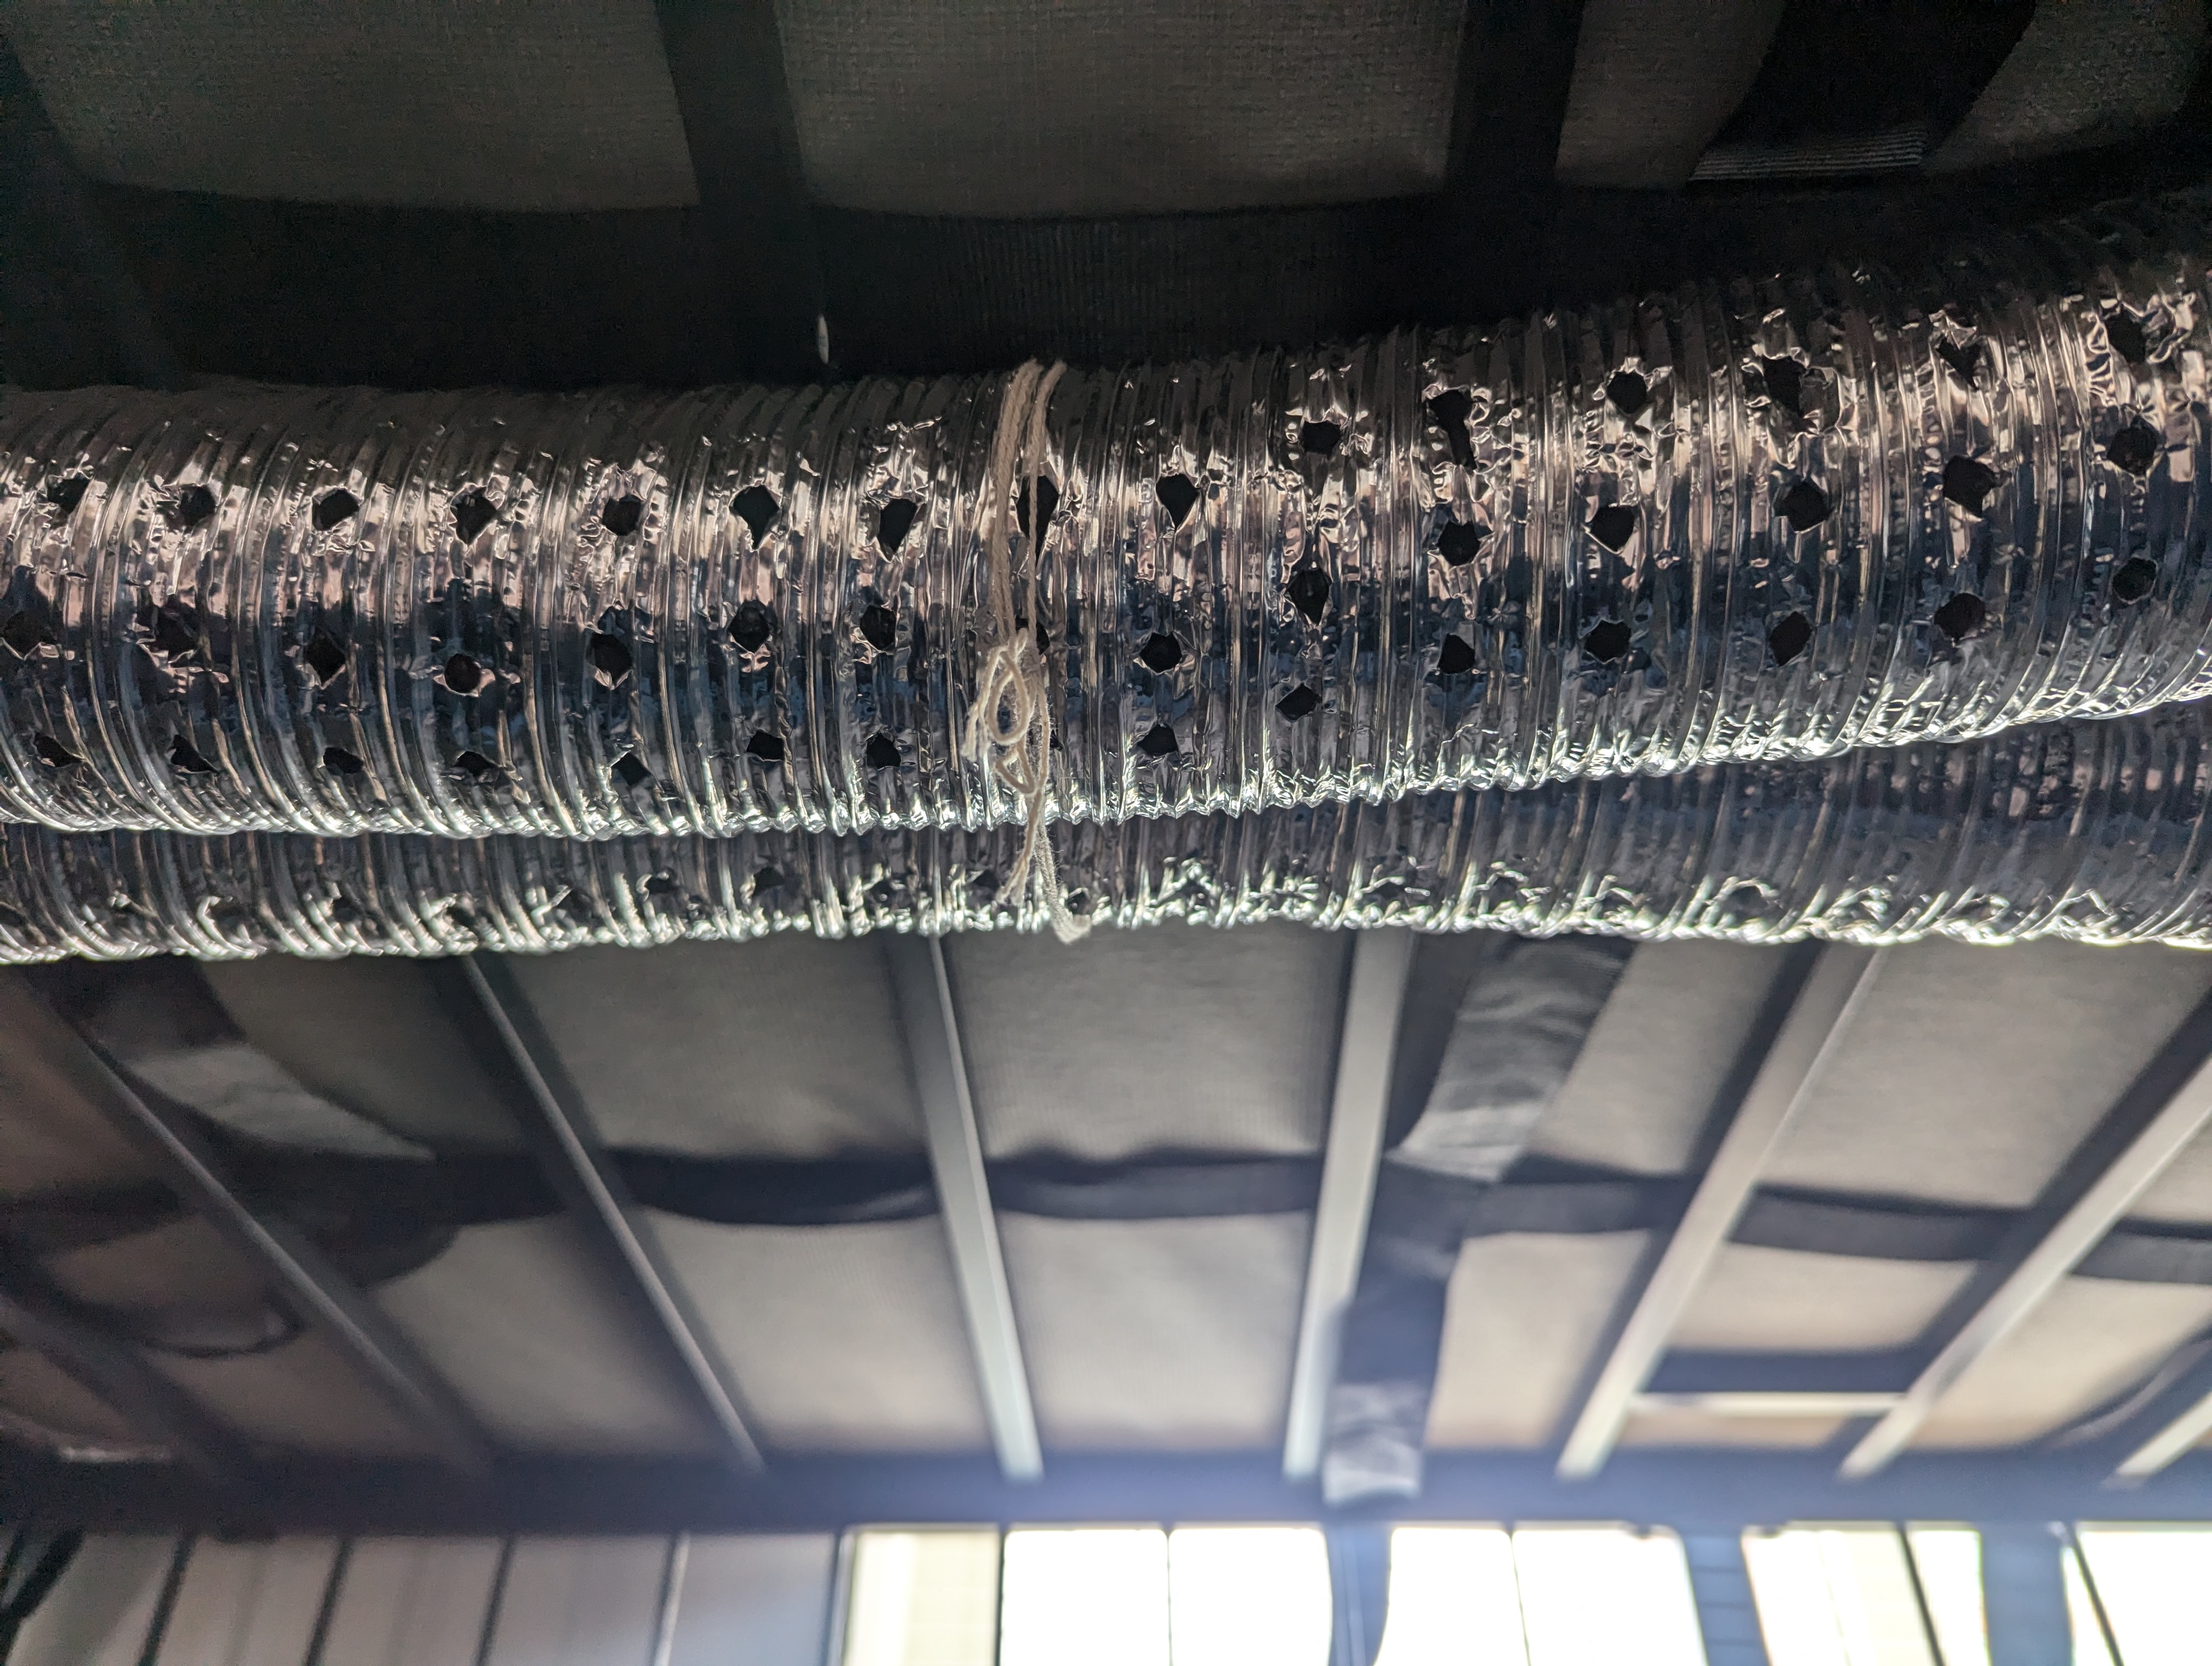
- Tie the duct to the center beam of the bed at multiple points with string or zip ties
- Place an end cap in the other end of the duct and attach it with another duct clamp
- Poke a bunch of holes in each duct. I don't know much about HVAC stuff but you need to poke about 150 1/4" holes in each duct to match the cross sectional area of the duct itself, which I assume is the requirement you need to meet to not restrict the airflow. This works out to 3 holes in each section of ducting between the wires for the ducting I used. Take a utility knife and a big phillips head screwdriver (or other suitably pointy 1/4" thick stick) and go down the duct, poking 3 small holes with the knife and then expanding them with the screwdriver in each foil section between the wires.
I put some electrical tape around the edges of the ducting because I was worried the thin metal might cut me.